Showing posts with label vegan. Show all posts

Thursday, January 24, 2013

Roasted Cauliflower, Olive, and Israeli Couscous Salad

I have a confession to make: I have been a food blogger for a couple years now, but until embarrassingly recently I just wasn't that into food blogs. My co-blogger was (and is). But I just gave her a blank stare when she would ask me if I read any number of really popular blogs. It is really only the past couple of months that I have jumped on board, and this may go hand in hand with the purchase of my iPad. Now I'm surfing away in the kitchen, and discovering new (or not so new) and fabulous food blogs making what I want to eat. (Wow, who would have thought? Yes, as I said... embarrassing.) This recipe for delicious warm cauliflower and Israeli couscous, which has become a staple in my kitchen, comes from one of the new-to-me blogs that I have been enjoying.
Oh My Veggies has earned its place on my meager reading list. It is a vegetarian food blog, and I am not vegetarian, but I have always eaten vegetarian more often than not. Kiersten, OMV blogger, is funny and personable, but better yet, her recipes are tasty and accessible - just what I'm after. This recipe uses mostly pantry staples (love that!), so when I grab a head of cauliflower at the market, I know that I can whip this up. The thing that makes this priceless is that my preschooler eats it too. That guarantees a repeat recipe in this household.

I highly recommend bolstering this dish with a little side of harissa (here is our tasty homemade version). It gives the dish a spicy kick-in-the-pants that makes me happy.

Roasted Cauliflower, Olive, and Israeli Couscous Salad


adapted from Oh My Veggies
  • 3 tbs olive oil, divided
  • 1 medium cauliflower, broken into florets
  • 1/2 cup pitted kalamatas, halved
  • 1 cup Israeli couscous, uncooked
  • 1/4 cup chopped parsley
  • 2 tbs lemon juice
  • 1 clove garlic, pressed
  • salt and pepper, to taste
1. Preheat oven to 400 F.

2. Spread cauliflower over a rimmed baking sheet. Drizzle with 1 tablespoon olive oil (saving 2 remaining tablespoons oil for later) and stir to coat. Sprinkle with some salt. Roast for 30 to 40 minutes, until golden brown.

3. Meanwhile, add Israeli couscous and 1 1/2 cup water to pan and bring to boil. Reduce heat to low and simmer for about 10 minutes, until water is absorbed. Remove from heat. (Check the directions on your Israeli couscous -- they are often different.)

4. Combine couscous, roasted cauliflower, olives, and parsley in a large bowl. In a small bowl, whisk together the remaining 2 tbs olive oil, lemon juice, and pressed garlic. Pour over the salad, and add salt and pepper to taste.

Friday, July 13, 2012

Basic Walnut Oil Vinaigrette

Summer salads are a staple around here, and one of my favorite types of dressing is a basic vinaigrette.  I’ve always made them with olive oil, but this summer I’ve discovered walnut oil and the pleasant nutty flavor it brings to a simple vinaigrette.  This dressing is so simple to pull together – only 3 ingredients.  The subtle toasty walnut flavor here is a great complement to anything from spicy greens, quinoa based salads, and bean or lentil summer salads. 


Oh, and let me come clean on my level of general laziness:  one of the reasons I’m a big vinaigrette fan is the fact that they’re so fast to pull together.  I recently got this nifty little tool which means I can make a vinaigrette in my liquid measuring cup – only one dirty dish!  Speaking of time and busy-ness and ‘laziness’ as a virtue…have you read this article from the NY Times?  A very interesting read.

Anyhow, next time you want to make a simple dressing but are wanting something a little different, give this walnut oil based vinaigrette a try.  I have been loving it on brown lentil salads, if you’re into that kind of thing!

Basic Walnut Oil Vinaigrette

  • 1/2 c walnut oil
  • 3 Tbsp balsamic vinegar
  • 2 tsp dijon mustard
Put balsamic vinegar and mustard in a liquid measuring cup.  Whisk together well, then drizzle in walnut oil while continuing to whisk.  Dressing will emulsify as you add the oil.  Store in the fridge; will keep for at least a month.


Monday, June 4, 2012

Popsicles with Roasted Strawberry & Coconut Milk

In search of something creamy and cool, with a seasonal fruit thrown in the mix, we came up with these popsicles.  With only three ingredients – coconut milk, roasted strawberries, and a spoonful of agave for sweetness - these are simple to make and easy to substitute in any seasonal fruit you’ve got on hand.  Not bad in terms of a reasonably healthy treat that makes toddlers literally squeal (loudly) with excitement!

roasted strawberry & coconut popsicles sq

We decided to see what would happen if we attempted to concentrate fresh strawberry flavors from fresh and light to rich and intense.  We love fresh strawberries, but their flavor sometimes seems too muted when you start using them as an ingredient (rather than eating them straight out of hand).  We did it simply by roasting the strawberries for 20 minutes. Sprinkled with a tablespoon of sugar, they develop bubbly brown edges and deep flavors.  Perfect for blending with coconut milk to create a creamy popsicle with lots of strawberry flavor.

roasted strawberry & coconut popsicles 3

To be honest, these popsicles came together as a result of leftovers. I had some coconut milk waiting in the fridge, and I was itching to use it in a summery dessert. We had leftover roasted strawberries from our latest cocktail over at our Whole Foods column, Locally Mixed.  A little agave for sweetness (chosen for its easy-to-stir-in consistency) and we had ourselves four sweet little popsicles! 

roasted strawberry & coconut popsicles 2

Popsicles with Roasted Strawberries & Coconut Milk

  • 1/2 c. coconut milk
  • 1/2 c. roasted strawberry puree (recipe below)
  • 1 Tbsp. agave

Blend all three ingredients together, pour into popsicles molds, and freeze overnight.  Warning:  This recipe only makes about 4 small popsicles; feel free to double it!


Roasted Strawberry Puree

  • 2 cups roughly chopped strawberries
  • Sprinkled with 1 Tbsp sugar

Yield: 1 cup

Roast at 400 for approx 20 minutes or until edges are browning and the pan contains bubbling & caramelizing strawberry juice.  I highly recommend a rimmed baking sheet for this recipe!  Scoop roasted strawberries into a glass jar for storage and mash them with a fork until they fall apart into a rough “puree”.

If you’re looking for another excuse to make a batch of the Roasted Strawberry Puree, here’s one:  Roasted Strawberry, Gin, & Ginger Cocktail!

roasted strawberry & coconut popsicles

Monday, April 16, 2012

Homemade Hummus

Homemade hummus is another one of those recipes that is so easy to make super fresh at home.  I’ve made a lot of hummus over the years, and in my research I learned a trick to making really creamy (as opposed to “grainy bean mash”) hummus. Yes, we have a trick to share with you! It’s easy.

Homemade Hummus

The secret to creamy hummus is the order in which you combine the ingredients. You start with the tahini, lemon juice, and water. Whir these together like crazy to create a totally smooth and creamy emulsion – it should look like thick cream. THEN you add the chickpeas and garlic and blend until smooth. The chemistry of whatever happens here creates the end result of creamy hummus rather than grainy bean mash. If you’re interested, drop in on some nice vegetarians ranting and raving about this over here.

Tahini & Lemons

You can catch a glimpse of the tahini emulsion in the upper right picture, below.

Making Hummus

Top your creamy fresh hummus with chopped parsley, drizzle with olive oil, and serve.  We (and our toddlers!) love this with carrots, pea pods, pita bread triangles, cabbage wedges, and loads of harissa.  Well…not the toddlers on that last one.

Homemade Hummus

Homemade Creamy Hummus

  • 1/4 cup tahini
  • 1/4 cup fresh lemon juice
  • 2 Tbsp water
  • 4 small cloves of raw garlic (the raw garlic adds a spicy kick so adjust according to your tastes!)
  • 16 oz can chickpeas, drained
  • 1/2 tsp salt
Put tahini, lemon juice, and water in the food processor. Blend (and scrape down if any tahini sticks) until it forms a thick creamy emulsion.
Blend garlic and salt into the tahini cream.
Add the chickpeas and blend until your hummus is totally smooth and creamy. Note that this recipe calls for fewer chickpeas (in proportion to the other ingredients) than many other recipes – it is more tahini and lemon heavy, which helps achieve that delicious texture!
Homemade Hummus

Tuesday, April 3, 2012

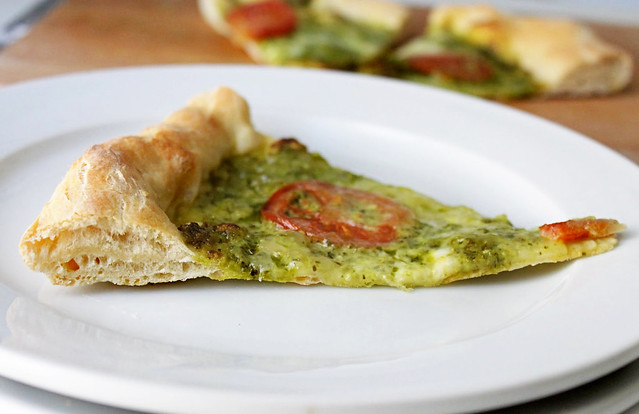
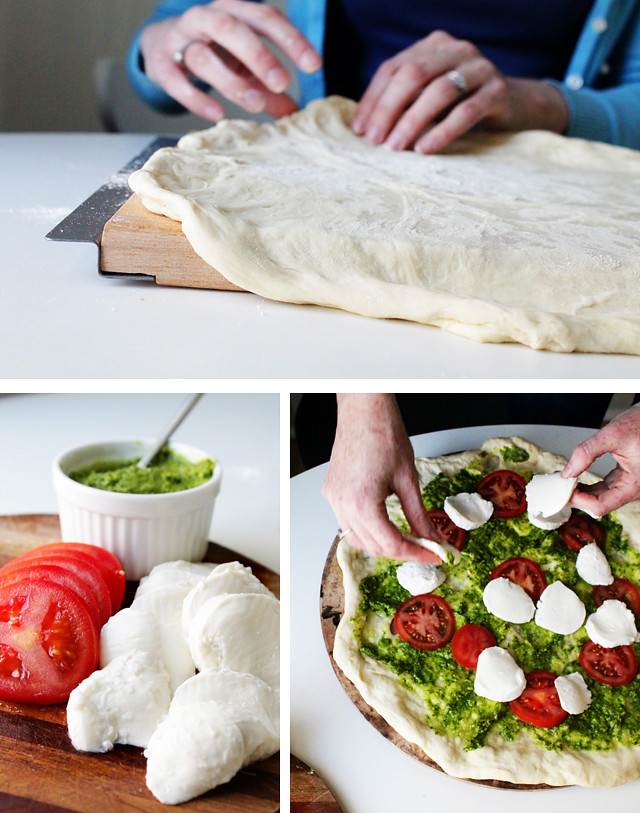
Homemade Pizza Dough

It has been a long time since we published our recipe for homemade pizza sauce. And in that time, we've made many, many pizzas. Some with our pizza sauce and some without. Usually with olives and sausage (my toddler's absolute favorite toppings) and other times with whatever we have rattling around in our fridges. We've tried several pizza dough recipes, and we finally settled on one we quite like, and then we got around to snapping some pictures before devouring the subject at hand.
As always being fans of the easiest option, we liked the idea of a pizza dough that you can make in a food processor. Let the food processor do all the dirty work. I had been using the recipe from Mark Bittman's How to Cook Everything, while Sarah had been working with Emeril Lagasse's version. In the end we melded them together and came up with the recipe below.
 Making pizza dough is surprisingly easy, and once you do it a few times, you might wonder why it ever intimidated you. This recipe makes two 14-inch pizzas, and you can make one and save the other for the next day. Suddenly, a homemade pizza is a simple lunch you are throwing together at the last minute.
Homemade Pizza Dough

makes 2 14-in pizzas
  • 1 package active dry yeast
  • 1 cup warm water
  • 2 1/2 to 3 cups all purpose flour, plus more if necessary
  • 2 teaspoons kosher salt
  • 2 tablespoons olive oil
1. Combine the yeast with the warm water in a small bowl, stir well, and let it sit for 5 minutes.
2. Transfer the yeast and water into the bowl of your food processor. Add the flour, salt, and olive oil and process until it forms a ball. Touch it and if it is quite sticky, add more flour until it is no longer very sticky and process a minute longer (for us it is close to 3 cups).
3. Knead the dough for a few minutes on a floured surface until it is a smooth and elastic dough. It should not be sticky, so add more flour if necessary. Place the dough in a lightly oiled bowl, and turn dough to coat with oil. Cover with a damp towel and let it rise in a warm place for an hour or so, until it has about doubled in size.
4. Place pizza stone in oven and preheat to 500 F. (We highly recommend a pizza stone! They are not expensive and they really make a big difference in the crispiness of the crust. They are awesome for baking bread, too.) If you don't have a stone, you can use a baking sheet -- don't put it into the oven until you put in the pizza itself.
5. Divide dough into two portions and shape into balls. Stretch or roll your dough into a circle (we usually just stretch with our hands rather than roll with a pin.) Take your time manipulating the dough. Sometimes the dough needs to rest a bit, so take a break, and then resume stretching until it is the right size and shape.
6. What we do, which may be a bit unconventional, is take our preheated pizza stone out of the oven, lay the shaped dough directly onto the stone and then put the toppings on. The dough will start cooking immediately, so we work fast. But we've had the best luck this way. For us, futzing around with a pizza peel leads to misshapen final pizzas. So we like this way... try it! Or use place the toppings on your pizza on a pizza peel, and then slide the pizza onto the stone that is in the oven.
7. Bake your pizza until crispy with a golden brown crust: around 10-13 minutes. 

Thursday, March 29, 2012

Homemade Almond Butter

If you’ve got a food processor, you can make homemade almond butter in a few minutes.  No preservatives, stabilizers, sugar, or salt here.  Just pure creamy almond goodness.  I am loving this homemade stuff much more than store bought, and I can’t put my finger on why.  It seems a little creamier, and the almond flavor is a little more intense.  Maybe I am appreciating the lack of salt and sugar, too? 

Homemade Almond Butter
Whatever the reason, this recipe is simple, healthy, and delicious.  My top two ways to eat it are on tart apple slices or with toast.  Look how creamy it is!


homemade almond butter

There are two things to keep in mind when making almond butter.

The first step is roasting the almonds, and you have a choice to make here.  Roast the almonds on the lighter side for an end product that is lighter in color and more almond-y in taste.  Roast the almonds longer, until they’re turning brown and are almost too roasted (we tested this out for you…you know, by accident) and you’ve got a much darker almond butter with strong bitter (almost chocolatey?) undertones.  I think the middle ground (about 10 min at 350) is best, but it’s fun to experiment with how the taste changes as you roast the almonds differently.
The second thing is that you need to let the almonds blend in the food processor for longer than you expect to get a truly creamy almond butter.  The first step is sandy, then the sand starts to clump and you may need to scrape down the sides a few times.  Then the almond butter begins to get gradually more and more creamy – let it go at this point for 2 minutes or so.  Done.

Homemade Almond Butter

Homemade Almond Butter

  • 2 cups raw almonds
Preheat oven to 350, then roast almonds on a rimmed baking sheet for approx 10 minutes or until fragrant and just beginning to turn golden brown.  We roasted our first batch of almonds a bit too long, which resulted in a very dark and slightly bitter almond butter (see notes above)
Let almonds blend in the food processor as they move from sandy to clumpy to smooth and liquid-y.  When they seem like they’re getting smooth, let them run for 2 minutes or so…otherwise our final product tended to be a little more firm than we liked.
homemade almond butter

Sunday, March 18, 2012

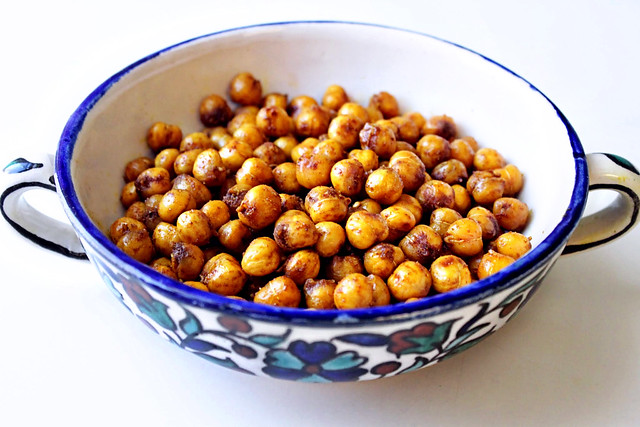
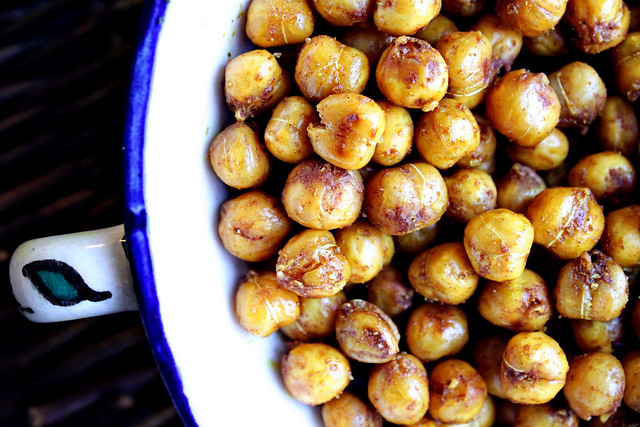
Moroccan-Spiced Roasted Chickpeas

We're always on the look out for quick and healthy snacks, and this recipe fits the bill. As a surprising bonus, our toddlers gobbled these crispy little chickpeas down.
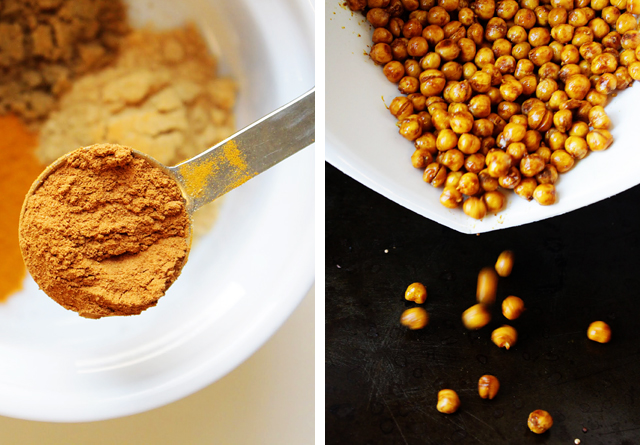
This is another recipe inspired by Super Natural Everyday, but not wanting to mess around with several paprikas among other flavorings, we looked to Morocco's cuisine for big flavor in only a few spices. Ginger, cinnamon, and cumin provide complex flavor in this snack that disappeared all too quickly after it came out of the oven.
Moroccan-Spiced Roasted Chickpeas
  • 2 15-oz cans chickpeas, rinsed and dried
  • 1/4 cup olive oil
  • 2 tsp cinnamon
  • 2 tsp ginger
  • 2 tsp cumin
  • 1 tsp sea salt
1. Preheat the oven to 425 F with a rack in the top third of the oven. Pour the chickpeas on a rimmed baking sheet and roast for 10 minutes. Shake the pan and roast for another 8 to 10 minutes. (Keep an eye on your chickpeas to avoid burning.)
2. Transfer the roasted chickpeas to a large bowl and mix together with olive oil, spices, and sea salt until well coated. Return to the baking sheet and roast for another 3 to 5 minutes. 

Monday, March 12, 2012

Lemon Asparagus

We found bundles of skinny new asparagus at the store this week! This recipe is our winner for spring asparagus.  It’s so simple and fast, but feels special and fancy.  That’s our favorite type of recipe, after all.  Here’s our trick:

lemon asparagus 4

Thin lemon slices arranged on a baking sheet.  Olive oil drizzled asparagus arranged in a layer over the top of the lemons.  Sprinkle with salt, broil for a few minutes.   Done!

lemon asparagus 2

The lemons get a little charred, and waft their lemony vapors up into the asparagus as they roast. 

lemon asparagus 1

The asparagus gets a little charred, too, during their quick trip under the broiler.  I especially love this treatment for the super skinny asparagus because their pointy tips get crispy and brown.  Oh and PS: our 2 year olds loved these!  And I quote “more green! more asparagarararasuss!”  Great liberties were taken with the pronunciation of the word asparagus.  We basked in the glow of toddlers gobbling vegetables of their own free will.

lemon asparagus 3

Lemon Asparagus

  • One pound fresh asparagus
  • One lemon
  • 2 Tbsp olive oil
  • sprinkle of salt

Thinly slice the lemon.  Arrange in one flat layer on a baking sheet.

Toss the asparagus with the olive oil until evenly coated.  Arrange asparagus over the lemon slices.  Sprinkle with salt.  Broil for approx 6 minutes (in our oven) or until asparagus spears get a few browned and crispy areas.

lemon asparagus 5

Thursday, January 5, 2012

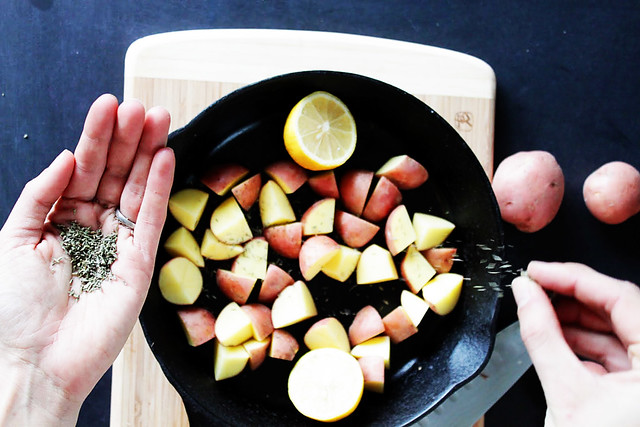
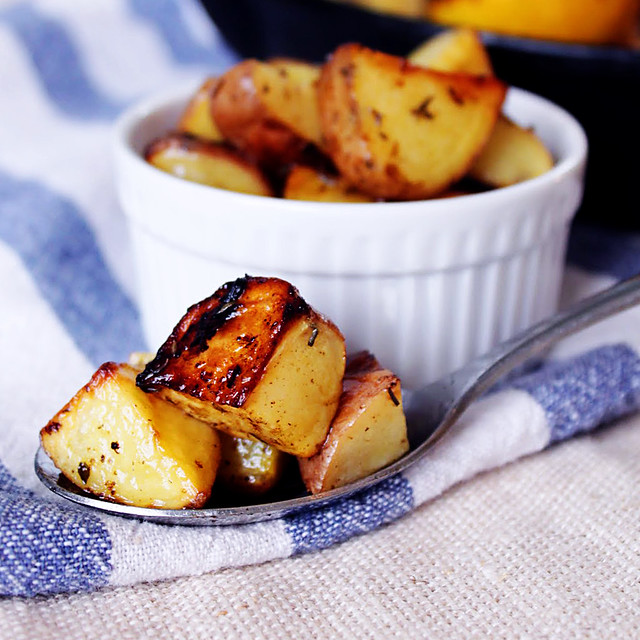
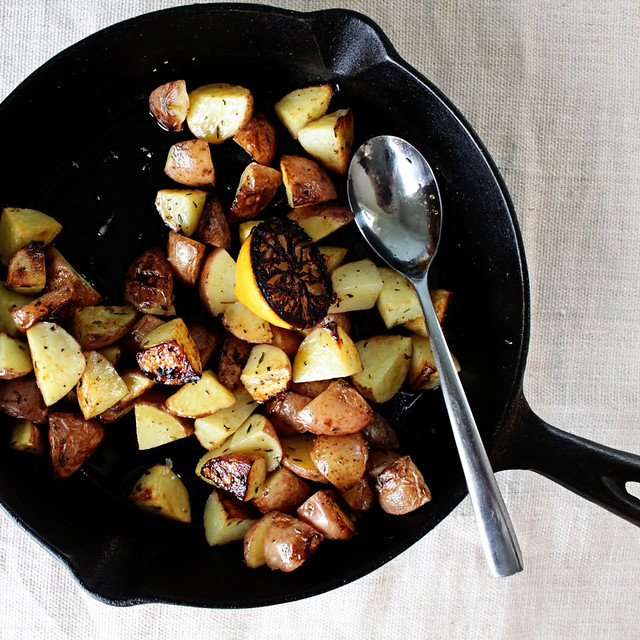
Roasted Potatoes with Lemon and Thyme

Here is a warm and wintry potato side dish brightened with the juice of half a lemon and seasoned with thyme. These potatoes would be equally at home served alongside a roast chicken as they would with some poached eggs for breakfast.
I love this recipe because, well, I love potatoes in pretty much all forms. But these potatoes are so delightfully crispy. And it is a fresh dish that uses ingredients that we usually have on hand. It didn't hurt that my toddler who is normally meh on potatoes (she must have been switched at birth) ate fistfuls.
Key points to remember for getting fabulously crisp potatoes: (1) preheat your oiled castiron skillet (or rimmed baking sheet), and (2) stir once while roasting. That's it really. This is a pretty darn easy recipe.

Roasted Potatoes with Lemon and Thyme

  • 3 c. chopped potatoes (in large bite-sized pieces)
  • 1 heaping teaspoon dried thyme (or fresh if you can get it)
  • 1 teaspoon salt
  • generous drizzle of olive oil (approx 3 Tbsp)
  • juice of 1/2 lemon
Preheat oven to 425 F. Drizzle a little olive oil into a cast iron skillet (or rimmed baking sheet) and let the skillet preheat inside the oven. Drizzle the chopped potatoes with olive oil, salt, and thyme. Mix well, then juice the half a lemon over the potatoes.
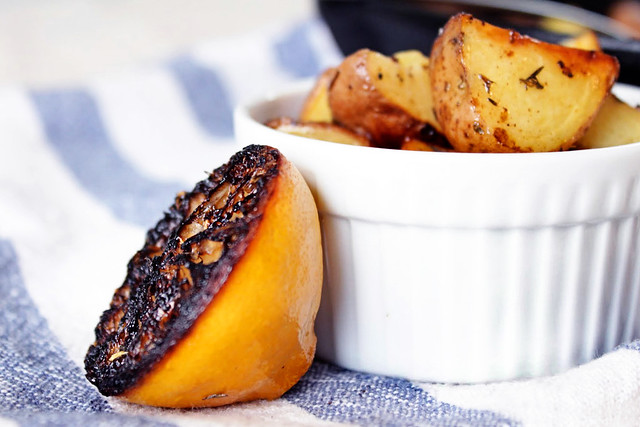
Remove the preheated pan from the oven, dump the potatoes into the pan, toss in the squeezed lemon half, and put back in to bake for 35 minutes. Stir once halfway through to ensure more than one side of each potato gets golden brown.

Tuesday, January 3, 2012

Winter Citrus Salad with Mint Sugar

This incredibly simple and colorful dish takes full advantage of the culinary highlight of January: bright, juicy citrus in January -- topped with a light sprinkle of mint sugar.
citrus salad 2
This is insanely fast and easy to pull together, impressive to serve at a brunch party, and nicely fresh which is a nice change after the sugar rush of the holidays. 
citrus salad 5
We sliced the citrus to show off its sparkling beauty, then topped it with just a pinch of mint sugar.  Any citrus – the more color the better – works here, but we went with grapefruit, tangerine, clementine, and a little lime.
citrus salad 3
citrus salad 1

Winter Citrus Salad with Mint Sugar

  • 1 grapefruit
  • 2 tangerines
  • 2 clementines
  • 1 lime
  • generous sprinkling of mint sugar (approx 2 Tbsp)
  • mint leaves as garnish
Remove rind from citrus with a sharp knife, then cut citrus crosswise to reveal the star pattern.  Admittedly, this isn’t the way to cut citrus for the fastest/easiest eating experience.  We chose to go with the cross sections for beauty, but if you want a fast-to-eat salad you could cut the citrus a little differently.
Arrange citrus slices on a serving platter, sprinkle with mint sugar (we used about 2 Tbsp), and garnish with mint leaves.  Serve!
citrus salad 4

Sunday, January 1, 2012

Mint Sugar

Here’s a fresh, simple recipe with endless potential. This mint sugar is comprised of lots of spicy fresh mint leaves whirred together with sugar in a food processor. That’s it!
mint sugar 2
The final product is sweet, yes, but it’s also refreshing and even a bit earthy. The ratio is 2:1 sugar to mint, so there’s really quite a lot of minty goodness packed in here.
mint sugar 3
This makes a great condiment to sprinkle on, say, a winter citrus salad. Or a unique sugared rim for a new cocktail.
mint sugar 1
Appropriate for winter, but with a breath of summer freshness, this is just what we needed to start off January right.

Mint Sugar

  • 1/4 c packed fresh mint leaves
  • 1/2 c sugar
Combine ingredients in a food processor and whir together until mint is finely chopped and evenly distributed. The final product looks remarkably like pesto. Due to the large amount of fresh mint in this recipe, it really doesn't last long. I'd recommend making just what you want to use in one day.
mint sugar 4
Related Posts Plugin for WordPress, Blogger...