Showing posts with label snack. Show all posts

Monday, September 24, 2012

Pumpkin Cream Cheese Muffins

Pumpkin muffins loaded with warm autumn spices and a delicious cream cheese center.  The epitome of fall! The type of recipe you make yourself and realize tastes much better than the coffee shop version! Behold:

Pumpkin Cream Cheese Muffin

This is another of those classic autumn recipes that we have seen making the rounds on Pinterest, so we pounced on the very first cool weather day to make these beauties.  We found lots of very similar versions of this recipe online (Annie’s Eats and See Brooke Cook to name two).  Let me tell you about how we’ve simplified them, just for discussion’s sake.

First of all, most recipes call for you to form the sweetened cream cheese into a log, wrap it in plastic, freeze it, then slice off medallions to plop into the center of the muffins.  The honest reason we didn’t do this is because we were too far along when we actually read this part of the recipe.  Oops, totally my fault.  I am the non-meticulous one.  We were so sad, thinking that our muffins would be a mess when they came out of the oven.  But they weren’t – the filling didn’t melt away and it all turned out quite beautifully. Whew!

DIY Pumpkin Cream Cheese Muffin

Next, most recipes called for the inclusion of both “pumpkin pie spice” as well as most of the individual components of pumpkin pie spice. We found this confusing and also we don’t keep pumpkin pie spice on hand, so we broke the spice mixture down into its basic parts (cinnamon, ginger, nutmeg, and clove).  This is nice and flexible – feel free to ad lib here; it will be OK if you leave a few out as long as you keep the cinnamon.

The other thing we did was reduce the sugar and oil in this recipe.  Now – you know us, and it wasn’t for health reasons but instead for taste reasons.  Many comments on the original recipes said the muffins were overly oily, so we reduced it a smidge. Then we started thinking that 1/2 cup sugar combined with 4 oz cream cheese would result in an uber-sweet filling, so we chopped the sugar amount in half. Last but not least, 1 cup of sugar in a recipe for 12 muffins seemed like a lot, so we reduced that to 3/4 cup and were very happy with the results.

Pumpkin Cream Cheese Muffin

Pumpkin Cream Cheese Muffins

Yield 12 muffins
Cream Cheese Filling
  • 4 oz cream cheese
  • 1/4 cup sugar
Whip together cream cheese and sugar very well.  We’ve done this with a fork, a hand mixer, and a food processor – anything works.  When it is all combined, pop it back in the fridge to stay cold while you prep the rest of the muffins.  Having this mixture as cool as possible will prevent the cream from melting away too much during baking.  The results in the picture were created with the cream mixture left at room temperature, though, so don’t worry too much about this cooling step!
Muffins
  • 3/4 cup sugar
  • 1/2 cup vegetable oil
  • 1 cup pumpkin puree
  • 2 eggs
  • 1 3/4 cup flour
  • 1/2 tsp baking soda
Our own version of “Pumpkin Pie Spices”; feel free to ad lib a little based on what you have on hand.  Nothing is essential other than the cinnamon.
  • 1 1/2 tsp cinnamon
  • 1/2 tsp ginger
  • 1/2 tsp nutmeg
  • 1/4 tsp cloves
Mix the sugar, oil, pumpkin, and eggs together very well in a large mixing bowl.  Then plop the flour, baking soda, and pumpkin pie spices on top of this blended wet mixture.  Stir well to incorporate and fully mix everything together. 
Line muffin tins with paper cups, or lightly oil them. Spoon about 1-2 Tablespoons of batter into the bottom of each muffin.  We used a regular dinner spoon – heaping – to do this.  Make sure this batter is spread thinly and evenly across the bottom of each muffin tin.  I whacked mine flat on the counter a few times to accomplish this.
Next, distribute a spoonful (approx 1 Tablespoon) of the cream cheese filling in each.
Finally, evenly distribute the remainder of the batter over the top of the cream cheese.  Approx 2-3 Tablespoons each is what we came out with.
Bake at 350 for 20-25 minutes.  Let cool before you eat them, unless you are ready to deal with molten cream cheese!


Pumpkin Cream Cheese Muffin

Pumpkin Cream Cheese Muffins

Pumpkin muffins loaded with warm autumn spices and a delicious cream cheese center.  The epitome of fall! The type of recipe you make yourself and realize tastes much better than the coffee shop version! Behold:

Pumpkin Muffins filled with cream cheese

This is another of those classic autumn recipes that we have seen making the rounds on Pinterest, so we pounced on the very first cool weather day to make these beauties.  We found lots of very similar versions of this recipe online (Annie’s Eats and See Brooke Cook to name two).  Let me tell you about how we’ve simplified them, just for discussion’s sake.

First of all, most recipes call for you to form the sweetened cream cheese into a log, wrap it in plastic, freeze it, then slice off medallions to plop into the center of the muffins.  The honest reason we didn’t do this is because we were too far along when we actually read this part of the recipe.  Oops, totally my fault.  I am the non-meticulous one.  We were so sad, thinking that our muffins would be a mess when they came out of the oven.  But they weren’t – the filling didn’t melt away and it all turned out quite beautifully. Whew!

process of construction pumpkin cream cheese muffins

Next, most recipes called for the inclusion of both “pumpkin pie spice” as well as most of the individual components of pumpkin pie spice. We found this confusing and also we don’t keep pumpkin pie spice on hand, so we broke the spice mixture down into its basic parts (cinnamon, ginger, nutmeg, and clove).  This is nice and flexible – feel free to ad lib here; it will be OK if you leave a few out as long as you keep the cinnamon.

The other thing we did was reduce the sugar and oil in this recipe.  Now – you know us, and it wasn’t for health reasons but instead for taste reasons.  Many comments on the original recipes said the muffins were overly oily, so we reduced it a smidge. Then we started thinking that 1/2 cup sugar combined with 4 oz cream cheese would result in an uber-sweet filling, so we chopped the sugar amount in half. Last but not least, 1 cup of sugar in a recipe for 12 muffins seemed like a lot, so we reduced that to 3/4 cup and were very happy with the results.

Pumpkin Cream Cheese Muffins with cheese peeping out

Pumpkin Cream Cheese Muffins

Yield 12 muffins

Cream Cheese Filling

  • 4 oz cream cheese
  • 1/4 cup sugar

Whip together cream cheese and sugar very well.  We’ve done this with a fork, a hand mixer, and a food processor – anything works.  When it is all combined, pop it back in the fridge to stay cold while you prep the rest of the muffins.  Having this mixture as cool as possible will prevent the cream from melting away too much during baking.  The results in the picture were created with the cream mixture left at room temperature, though, so don’t worry too much about this cooling step!

Muffins

  • 3/4 cup sugar
  • 1/2 cup vegetable oil
  • 1 cup pumpkin puree
  • 2 eggs
  • 1 3/4 cup flour
  • 1/2 tsp baking soda

Our own version of “Pumpkin Pie Spices”; feel free to ad lib a little based on what you have on hand.  Nothing is essential other than the cinnamon.

  • 1 1/2 tsp cinnamon
  • 1/2 tsp ginger
  • 1/2 tsp nutmeg
  • 1/4 tsp cloves

Mix the sugar, oil, pumpkin, and eggs together very well in a large mixing bowl.  Then plop the flour, baking soda, and pumpkin pie spices on top of this blended wet mixture.  Stir well to incorporate and fully mix everything together. 

Line muffin tins with paper cups, or lightly oil them. Spoon about 1-2 Tablespoons of batter into the bottom of each muffin.  We used a regular dinner spoon – heaping – to do this.  Make sure this batter is spread thinly and evenly across the bottom of each muffin tin.  I whacked mine flat on the counter a few times to accomplish this.

Next, distribute a spoonful (approx 1 Tablespoon) of the cream cheese filling in each.

Finally, evenly distribute the remainder of the batter over the top of the cream cheese.  Approx 2-3 Tablespoons each is what we came out with.

Bake at 350 for 20-25 minutes.  Let cool before you eat them, unless you are ready to deal with molten cream cheese!

pumpkin cream cheese muffins

Monday, June 4, 2012

Popsicles with Roasted Strawberry & Coconut Milk

In search of something creamy and cool, with a seasonal fruit thrown in the mix, we came up with these popsicles.  With only three ingredients – coconut milk, roasted strawberries, and a spoonful of agave for sweetness - these are simple to make and easy to substitute in any seasonal fruit you’ve got on hand.  Not bad in terms of a reasonably healthy treat that makes toddlers literally squeal (loudly) with excitement!

roasted strawberry & coconut popsicles sq

We decided to see what would happen if we attempted to concentrate fresh strawberry flavors from fresh and light to rich and intense.  We love fresh strawberries, but their flavor sometimes seems too muted when you start using them as an ingredient (rather than eating them straight out of hand).  We did it simply by roasting the strawberries for 20 minutes. Sprinkled with a tablespoon of sugar, they develop bubbly brown edges and deep flavors.  Perfect for blending with coconut milk to create a creamy popsicle with lots of strawberry flavor.

roasted strawberry & coconut popsicles 3

To be honest, these popsicles came together as a result of leftovers. I had some coconut milk waiting in the fridge, and I was itching to use it in a summery dessert. We had leftover roasted strawberries from our latest cocktail over at our Whole Foods column, Locally Mixed.  A little agave for sweetness (chosen for its easy-to-stir-in consistency) and we had ourselves four sweet little popsicles! 

roasted strawberry & coconut popsicles 2

Popsicles with Roasted Strawberries & Coconut Milk

  • 1/2 c. coconut milk
  • 1/2 c. roasted strawberry puree (recipe below)
  • 1 Tbsp. agave

Blend all three ingredients together, pour into popsicles molds, and freeze overnight.  Warning:  This recipe only makes about 4 small popsicles; feel free to double it!


Roasted Strawberry Puree

  • 2 cups roughly chopped strawberries
  • Sprinkled with 1 Tbsp sugar

Yield: 1 cup

Roast at 400 for approx 20 minutes or until edges are browning and the pan contains bubbling & caramelizing strawberry juice.  I highly recommend a rimmed baking sheet for this recipe!  Scoop roasted strawberries into a glass jar for storage and mash them with a fork until they fall apart into a rough “puree”.

If you’re looking for another excuse to make a batch of the Roasted Strawberry Puree, here’s one:  Roasted Strawberry, Gin, & Ginger Cocktail!

roasted strawberry & coconut popsicles

Sunday, March 18, 2012

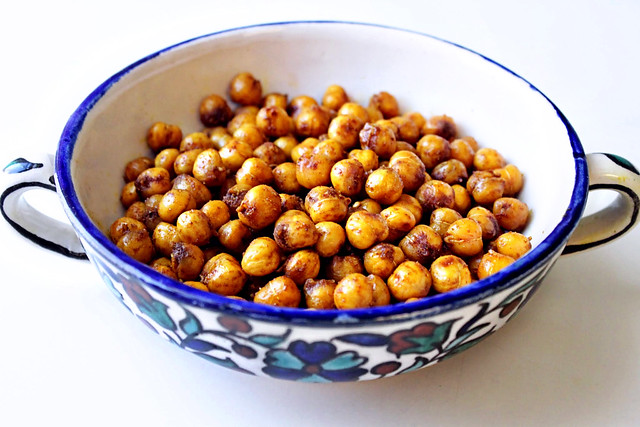
Moroccan-Spiced Roasted Chickpeas

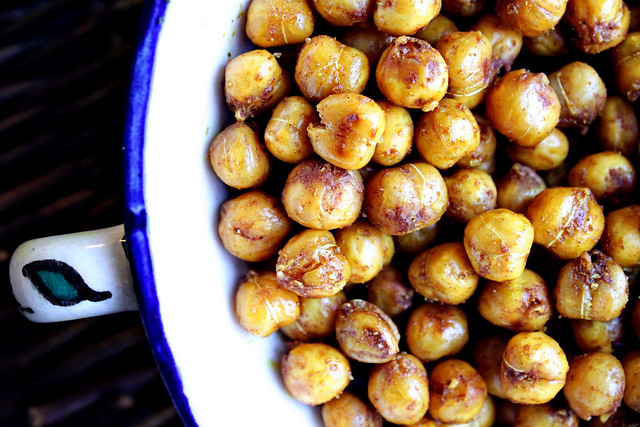
We're always on the look out for quick and healthy snacks, and this recipe fits the bill. As a surprising bonus, our toddlers gobbled these crispy little chickpeas down.
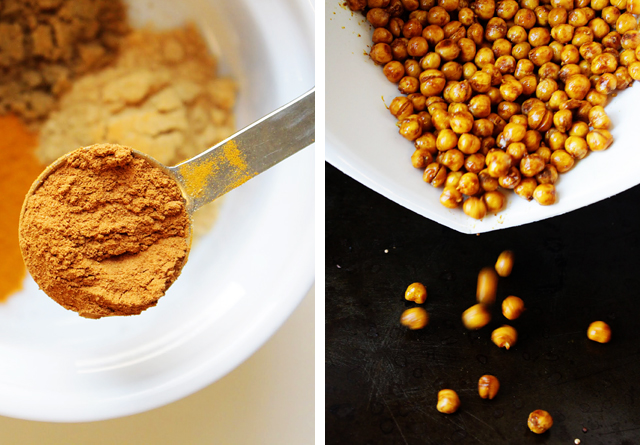
This is another recipe inspired by Super Natural Everyday, but not wanting to mess around with several paprikas among other flavorings, we looked to Morocco's cuisine for big flavor in only a few spices. Ginger, cinnamon, and cumin provide complex flavor in this snack that disappeared all too quickly after it came out of the oven.
Moroccan-Spiced Roasted Chickpeas
  • 2 15-oz cans chickpeas, rinsed and dried
  • 1/4 cup olive oil
  • 2 tsp cinnamon
  • 2 tsp ginger
  • 2 tsp cumin
  • 1 tsp sea salt
1. Preheat the oven to 425 F with a rack in the top third of the oven. Pour the chickpeas on a rimmed baking sheet and roast for 10 minutes. Shake the pan and roast for another 8 to 10 minutes. (Keep an eye on your chickpeas to avoid burning.)
2. Transfer the roasted chickpeas to a large bowl and mix together with olive oil, spices, and sea salt until well coated. Return to the baking sheet and roast for another 3 to 5 minutes. 

Monday, October 10, 2011

Lemon Currant Scones

These delicious golden scones are packed with currants and lemon zest, and made with butter and heavy cream.  So of course they’re delicious.  They’re very pretty too – brushing the tops with a little beaten egg and cream before baking creates a golden crust that’s lovely and tasty.

currant scones

I have been excitedly awaiting the cooler weather of fall so that I could start baking without heating my house to the point of insanity.  These scones were perfect for a brunchy fall snack.

currant scones

The dough is dry but really wasn’t hard to work with.  The trick is to shape it into rounds, then cut those rounds into wedges - on the parchment paper you’ll be baking the scones on.  Not having to transfer them from a working surface to a baking surface makes things much easier.

Lemon Currant Scones

  • 2 c flour
  • 1/4 c sugar
  • 2 tsp baking powder
  • 1/4 tsp salt
  • 1/3 c cold butter, cubed
  • 1 egg
  • 1/2 c heavy cream
  • 1/2 c currants
  • zest of one lemon

Preheat oven to 375

Whisk together flour, sugar, baking powder, and salt. Cut the cubed butter into the dry ingredients with a pastry blender or your fingers until it resembles coarse crumbs.

In a liquid measuring cup, whisk together cream and egg, then add the liquids to the drys.  Reserve 1 Tbsp of the cream/egg liquid.  Stir until just combined, then dump onto a piece of parchment paper.  Knead 3-4 times until the dough just holds together, then shape into two rounds.  Cut each round into quarters and pull the pieces a few inches apart.

Brush tops of scones with the remaining cream/egg liquid. Bake at 375 for 15-18 minutes.

currant scones

Thursday, October 6, 2011

Spiced Nuts

Now that it’s October, we felt the need to roast some nuts to a sweet and autumn-spiced crunch.
spiced nuts 1
These are the result, and the main thing I have to say about them is that I had no idea it was so easy to replicate the super crunchy crispy nuts that you can find at street fairs during the holiday season. 
The egg whites create a very nice and extremely crispy shell, the sugar does what sugar should do, and the spices make these taste like fall.  And Dulcie and I agree that fall is the #1 best season.  Don’t you?

Spiced Nuts

  • 2 eggs whites
  • 4 cups whole raw nuts (I used almonds, walnuts, and pecans)
  • 1 cup white sugar (vanilla sugar if you have it!)
  • 2 tsp cinnamon
  • 1/4 tsp ground cloves
  • 1/2 tsp nutmeg
Add the two eggs whites to a large bowl and whisk until broken up and just starting to become foamy.
Add the 4 cups of nuts and stir well to completely coat the nuts in the egg white.  Add sugar and spices, stir well to coat.  Spread the nuts into a single thin layer on 2 baking sheets covered in parchment.
Bake at 300 degrees for 30-40 minutes, or until nuts are no longer sticky and flexible.  Let cool completely, then break apart and enjoy.
Thank you to 101cookbooks for the technique inspiration!
spiced nuts 2

Thursday, July 14, 2011

Multigrain Crackers

Cooking for toddlers is a frustrating endeavor.  You put in some serious thought, make something you’re sure they’ll love…and they chew it a little bit, then spit it on the floor.  But I think I’ve finally figured out a trick.  Things in cracker form are almost always accepted, and maybe even begged for. 

crackers sq 1

Remember our whole wheat cheddar crackers?  The ones that made random, unknown toddlers tug on my pants and ask “more? more?”   These multigrain crackers seem to work the same magic!

crackers 4

These are even better, though, because they are easily transformed to an adult snack.  Cheese, a fresh basil leaf, and a quartered cherry tomato creates a perfect summer snack for late afternoon.

crackers 3

These have a lot of texture from the oats and whole wheat flour, then a little crunch from the corn meal.  Make sure you roll the crackers out as THINLY as possible for the most cracker-like experience.  Our thicker crackers tasted a little more like pie crust than crackers.

Multigrain Crackers

  • 3/4 whole wheat flour
  • 1/4 c finely ground corn meal
  • 1/4 c oats
  • 1 Tbs. sugar
  • ½ tsp. salt
  • ¼ tsp. paprika
  • 4 Tbs. cold butter, cut into small cubes
  • ¼ c. water

Preheat oven to 400.

Start with the oats in a food processor and pulse until the oats are grainy sand textured. Add the rest of the dry ingredients and pulse to combine.  Sprinkle the cold butter cubes, then turn on the processor and drizzle in the water.  The dough should pull together into a ball; add slightly more water if necessary.

Roll out the dough ON a cookie sheet that’s been lined with parchment or foil.  This way you don’t have to move the crackers after they’re cut out. Roll the dough as THINLY as you possibly can.  This is really the trick to the recipe – roll them thinly. I found it was easier to roll the dough in two batches – working with smaller amounts of dough helped me roll it more thinly.  Use a pizza cutter to score the rolled out dough into squares of 1 or 1.5”

Bake at 400 for 5-10 minutes.  After 5 minutes begin checking – the crackers on the outer edges may finish first.  Remove them and return the center crackers to finish baking.  They're done when they turn golden brown on the edges – it happens fast, so watch closely to learn how your oven treats theses crackers.

Thank you to Kitchen Stewardship for the recipe inspiration!

crackers 2

Thursday, June 2, 2011

Homemade Greek Yogurt

Greek yogurt has been quite fashionable these days, and it is easy to see why. It is thick and decadently creamy, even in the low- or zero-fat varieties. It also has much higher protein than regular yogurt (making it my snack of choice all throughout my pregnancy.)
But while Greek yogurt has increased in popularity here in the U.S., it isn't always easy to find. Where I live, it is easy to find conventional and low-fat Greek yogurt, but nearly impossible to locate Greek yogurt that is both organic and made from whole milk. Fortunately, it is very easy to make your own Greek yogurt from store-bought (or homemade) yogurt!
Greek yogurt is much more expensive than regular yogurt, but when you strain the regular yogurt, it decreases by about half. I found that even with the yield being cut by half, I was still saving money (although prices vary by store and region). It was nice to save a couple quarters, but it was especially nice to get such a creamy, delicious, and all natural end-product!
We snacked on our fresh Greek yogurt mixed with local honey and raspberries. This might be our toddlers' new favorite food!
Homemade Greek Yogurt

1. Place a colander over a large bowl, ensuring that there is enough space below the colander for the yogurt to drain and not sit in the whey.
2. Fold cheesecloth four times and place into colander.
3. Place yogurt (store-bought or homemade) into cheesecloth, and then fold ends of cheesecloth over the yogurt so it is completely covered.
4. Place a small plate on top of the cheesecloth-covered yogurt, and something heavy (like a ceramic bowl) on top of the plate. This helps press the whey out of the yogurt.
5. Let drain in the refrigerator for about 6-10 hours, and then remove yogurt from cheesecloth and store in sealed container. You can save your whey for another use (like our Lemony Barley Salad) or discard.
Related Posts Plugin for WordPress, Blogger...