Showing posts with label breakfast. Show all posts

Friday, February 7, 2014

Baked Cinnamon Sugar Donuts

When it came time to bring a birthday snack to my daughter's preschool, I decided to forgo the usual cupcake and whip up some baked donuts. Baked donuts are really nothing like what you buy at the donut shop but are rather cakey and muffin-like. I have no complaints about that. And when you dip them in butter and roll them around in cinnamon and sugar, they taste like quite the indulgent treat.
Once I bought my donut pan, I started using it all the time. These are a nice basic baked donut recipe (perfect for those finicky preschoolers -- oh, and the rest of us). You can consider this your gateway baked donut.

Baked Cinnamon Sugar Donuts


from Ina Garten
 
  • 2 cups all-purpose flour
  • 1 1/2 cups sugar
  • 2 tsp baking powder
  • 1 tsp cinnamon
  • 1/2 tsp nutmeg
  • 1/2 tsp salt
  • 1 egg, lightly beaten
  • 1 1/4 cups whole milk
  • 2 TBs unsalted butter, melted and slightly cooled
  • 2 tsp vanilla extract

cinnamon sugar topping:
  • 8 TBs (1 stick) unsalted butter
  • 1/2 cup sugar
  • 1/2 tsp ground cinnamon

1. Preheat your oven to 350 F. Whisk together the flour, sugar, baking powder, cinnamon, nutmeg, and salt in a large bowl. In a small bowl, whisk together the egg, milk, melted butter, and vanilla. Stir the wet mixture into the flour mixture.
2. Fill up your donut pan so that each donut is about 3/4 filled with batter. Bake for 15-17 minutes, until an inserted toothpick comes out clean. Let cool for a few minutes, and then tap the donuts out.
3. For the topping: Melt the 8 tablespoons butter in a small pan. Combine sugar and cinnamon in a shallow bowl. Dip each donut first in the butter and then in the cinnamon sugar. You can do either one side or both sides of each donut.
 

Wednesday, May 29, 2013

Peanut Butter Banana Muffins

I created these muffins for a healthy (and preschooler friendly) snack the other day; I wanted them to be an alternative to banana bread.  My family loves banana bread; I love peanut butter toast with banana sliced on top.  These muffins are a happy hybrid of the two. They incorporate three whole bananas, a bunch of creamy peanut butter, and are made with half whole wheat flour. Yum!
peanut butter banana muffins 2
I threw in a handful of cacao nibs for some crunch.  The nibs are totally optional, and they didn’t add a ton of flavor.  You could even use crunchy peanut butter instead, if you want crunch but don’t have cacao nibs on hand.  Chocolate chips would be pretty great too. I bet if I’d added chocolate chips Dulcie would have been fighting me for the leftover muffins!
peanut butter & cacao nibs
These definitely walk the line between health food and a treat, which I’m a huge fan of in my muffin making. Like these muffins, for example. And as far as I can tell, all kids are big fans of both peanut butter and banana.  
peanut butter banana muffins

Peanut Butter Banana Muffins with Cacao Nibs

  • 3 ripe bananas, mashed
  • 1/2 cup brown sugar
  • 1/4 cup honey
  • 3/4 cup peanut butter
  • 2 eggs
  • 1/3 cup vegetable oil
  • 1 tsp vanilla extract
  • 1 cup flour
  • 1 cup whole wheat flour
  • 1 tsp baking soda
  • 1/2 tsp salt
  • 1/2 cup cacao nibs
Preheat oven to 400 F.
Combine the bananas, sugar, honey, peanut butter, eggs, vegetable oil and vanilla extract in a food processor and process until smooth.  You could also use a mixer or a wooden spoon plus a strong arm; I’ve just gotten in the habit of combining all the wet ingredients for muffins using the food processor.  It makes quick work of the bananas!
Combine the flours, baking soda, salt, and cacao nibs in a large bowl.  Pour the wet mixture over the dry and stir to combine.
Spoon into a prepared muffin tin (I used papers), then bake at 400 for 16-18 minutes.
          peanut butter banana muffins sq

          Wednesday, April 3, 2013

          The Best Coffeecake You’ll Ever Have

          Hey guys, we’re excited to announce that our recipe for our very favorite Coffeecake is being featured over on Cup of Jo today!  Go check it out, here’s the link

          Hint: the cake is almond scented and studded with raspberries. Mmmm!

          coffee cake

          Monday, October 1, 2012

          Almond Biscotti

          Around the time that temperatures begin to drop, I experience a craving for almonds. Almond butter, almond cake, even almond-scented dish soap. (Similarly, towards the end of winter, I experience an all-out lemon frenzy.) But here we are at the beginning of fall, and all I want is some almond biscotti to dunk into my morning coffee.
          I already had a very favorite biscotti recipe which I've shared previously. But there are times, I hate to admit, when chocolate is a little too much early in the morning. My 3-year-old now wants to eat just what I'm eating, and I do not feel like parent-of-the-year when she's enjoying an 8am chocolate cookie. These almond biscotti are not exactly health food, but they aren't so bad for you either. Unlike our chocolate hazelnut biscotti, there is no butter (and no oil either).
          This recipe combines both almond extract and a heaping pile of toasted chopped almonds to intensify that nutty flavor. And as all biscotti are, they are baked in long logs, sliced, and then baked again to get that crisp texture that just begs to be dipped into a piping hot cup of coffee or tea.

          Almond Biscotti


          adapted from joyofbaking.com
          • 3/4 cup whole almonds
          • 3 large eggs
          • 1 tsp pure vanilla extract
          • 1/2 tsp pure almond extract
          • 2 cups all-purpose flour
          • 3/4 cup granulated white sugar
          • 1 tsp baking powder
          • 1/4 tsp salt
          1. Preheat oven to 350 F. Place the almonds on a baking sheet and bake for about 8-10 minutes, until toasted and fragrant. Let cool, and then chop coarsely.

          2. Reduce the oven temperature to 300 F, and line a baking sheet with parchment paper.


          3. In a small bowl, whisk together the eggs with the extracts.


          4. In a large bowl, combine the flour, sugar, baking powder, and salt. Stir in the almonds, and then add the eggs and combine until a dough forms. (If it seems very dry, add just a few drops of water until dough comes together.) 


          5. Divide the dough in half, and on a floured board, roll each half into a log about 7 inches long and 3 inches wide. Transfer logs to the parchment paper and bake for about 35 minutes. Remove from oven and let cool for about 15 minutes.


          6. Transfer the logs to a cutting board, and using a sharp knife, cut into 1/2 inch slices. Place the slices onto the baking sheet, and bake for 12 more minutes. Then, flip slices over and bake for 12 more minutes, until very crisp. Remove from oven, let cool, and then store in an airtight container for up to several weeks. Makes 35-40 biscotti.


          Monday, September 24, 2012

          Pumpkin Cream Cheese Muffins

          Pumpkin muffins loaded with warm autumn spices and a delicious cream cheese center.  The epitome of fall! The type of recipe you make yourself and realize tastes much better than the coffee shop version! Behold:

          Pumpkin Cream Cheese Muffin

          This is another of those classic autumn recipes that we have seen making the rounds on Pinterest, so we pounced on the very first cool weather day to make these beauties.  We found lots of very similar versions of this recipe online (Annie’s Eats and See Brooke Cook to name two).  Let me tell you about how we’ve simplified them, just for discussion’s sake.

          First of all, most recipes call for you to form the sweetened cream cheese into a log, wrap it in plastic, freeze it, then slice off medallions to plop into the center of the muffins.  The honest reason we didn’t do this is because we were too far along when we actually read this part of the recipe.  Oops, totally my fault.  I am the non-meticulous one.  We were so sad, thinking that our muffins would be a mess when they came out of the oven.  But they weren’t – the filling didn’t melt away and it all turned out quite beautifully. Whew!

          DIY Pumpkin Cream Cheese Muffin

          Next, most recipes called for the inclusion of both “pumpkin pie spice” as well as most of the individual components of pumpkin pie spice. We found this confusing and also we don’t keep pumpkin pie spice on hand, so we broke the spice mixture down into its basic parts (cinnamon, ginger, nutmeg, and clove).  This is nice and flexible – feel free to ad lib here; it will be OK if you leave a few out as long as you keep the cinnamon.

          The other thing we did was reduce the sugar and oil in this recipe.  Now – you know us, and it wasn’t for health reasons but instead for taste reasons.  Many comments on the original recipes said the muffins were overly oily, so we reduced it a smidge. Then we started thinking that 1/2 cup sugar combined with 4 oz cream cheese would result in an uber-sweet filling, so we chopped the sugar amount in half. Last but not least, 1 cup of sugar in a recipe for 12 muffins seemed like a lot, so we reduced that to 3/4 cup and were very happy with the results.

          Pumpkin Cream Cheese Muffin

          Pumpkin Cream Cheese Muffins

          Yield 12 muffins
          Cream Cheese Filling
          • 4 oz cream cheese
          • 1/4 cup sugar
          Whip together cream cheese and sugar very well.  We’ve done this with a fork, a hand mixer, and a food processor – anything works.  When it is all combined, pop it back in the fridge to stay cold while you prep the rest of the muffins.  Having this mixture as cool as possible will prevent the cream from melting away too much during baking.  The results in the picture were created with the cream mixture left at room temperature, though, so don’t worry too much about this cooling step!
          Muffins
          • 3/4 cup sugar
          • 1/2 cup vegetable oil
          • 1 cup pumpkin puree
          • 2 eggs
          • 1 3/4 cup flour
          • 1/2 tsp baking soda
          Our own version of “Pumpkin Pie Spices”; feel free to ad lib a little based on what you have on hand.  Nothing is essential other than the cinnamon.
          • 1 1/2 tsp cinnamon
          • 1/2 tsp ginger
          • 1/2 tsp nutmeg
          • 1/4 tsp cloves
          Mix the sugar, oil, pumpkin, and eggs together very well in a large mixing bowl.  Then plop the flour, baking soda, and pumpkin pie spices on top of this blended wet mixture.  Stir well to incorporate and fully mix everything together. 
          Line muffin tins with paper cups, or lightly oil them. Spoon about 1-2 Tablespoons of batter into the bottom of each muffin.  We used a regular dinner spoon – heaping – to do this.  Make sure this batter is spread thinly and evenly across the bottom of each muffin tin.  I whacked mine flat on the counter a few times to accomplish this.
          Next, distribute a spoonful (approx 1 Tablespoon) of the cream cheese filling in each.
          Finally, evenly distribute the remainder of the batter over the top of the cream cheese.  Approx 2-3 Tablespoons each is what we came out with.
          Bake at 350 for 20-25 minutes.  Let cool before you eat them, unless you are ready to deal with molten cream cheese!


          Pumpkin Cream Cheese Muffin

          Wednesday, August 22, 2012

          Ricotta Pancakes with Blueberries

          Over the last several weeks, Sarah and I have taken turns going on vacation. I visited the very lovely and blissfully cool and cloudy Oregon coast, while Sarah has been blazing through various Midwestern states. This has been great in many ways, but not so great for our blog which has been sadly neglected. We aim to post with greater frequency very soon! In the meantime, we offer up one of our new favorite breakfast treats.
          These are light and ethereal pancakes, and the ricotta makes them surprisingly moist. We took advantage of the abundant blueberries that are in season, but they would also be excellent with frozen blueberries. In  fact, I can't wait to try this recipe which whatever berry I have on hand.
          I tend to shy away from recipes that involve beating egg whites, but really it only takes an extra few minutes. If you have an electric mixer, it is seriously no big whoop. And it makes such a big difference in texture and lightness! Totally worth it. Try it, you'll see.
          Ricotta Pancakes with Blueberries
          adapted from Food & Wine

          • 1 1/2 cups all-purpose flour
          • 1 tsp baking powder
          • 1 1/2 tsp kosher salt
          • 3 eggs, separated
          • 1 3/4 cups milk
          • 2/3 cup ricotta cheese
          • 1/4 cup sugar
          • 1 tb pure vanilla extract
          • unsalted butter, for the griddle
          • 1 pint fresh blueberries
          1. Whisk flour, baking powder, and salt together in a bowl.
          2. In another bowl, whisk egg yolks, milk, ricotta, sugar, and vanilla. Combine wet and dry ingredients and mix until smooth.
          3. Beat the egg whites until soft peaks form (watch that you don't over-beat it!) Fold into the batter.
          4. Butter your griddle. For each pancake, pour about 1/4 cup of batter onto the griddle, being sure not to crowd your pancakes. Cook over medium-low heat for a couple of minutes, until bottoms are lightly golden. Press a few blueberries unto each pancake, and then flip. Cook a minute or so longer, until pancake is golden. Serve with maple syrup!

          Wednesday, June 27, 2012

          Blueberry Lemon Muffins

          Summer fresh blueberries brightened up with lemon zest & juice make these muffins a perfect summertime treat.  They’re made with a base of yogurt which makes them moist and tender without being oily or too cake-like.


          The colors in these muffins are so beautiful – dark blue and bright purple berries complimented with a soft yellow lemony crumb.  We love these fresh simple flavor combinations for summer; you don’t need a complicated mish mash of flavors when it’s so hot and beautiful outside.  Just pure whole foods based goodness.


          When you pull the muffins out of the oven you’ll see bubbling purple blueberry juice oozing around the edges.  Restrain yourself to prevent burns! It’s hard, I know.  The berries provide plenty of natural sweetness, and the muffin batter itself only contains 1/2 c sugar so these muffins are not overly sweet, which we prefer.


          Pile the cooled muffins in a bowl and enjoy for breakfast, snacks, and dessert.

          Blueberry Lemon Muffins

          • 1 cup plain yogurt (we used full fat Greek yogurt)
          • 1/3 cup milk
          • 1 egg
          • 1/3 cup oil
          • 1/2 teaspoon vanilla
          • 1 3/4 cups flour
          • 1/2 cup sugar
          • 1 teaspoon baking powder
          • 1/2 teaspoon baking soda
          • 1/4 teaspoon salt
          • 3/4 cups fresh blueberries (although frozen would work just fine)
          • Zest and juice of 1 lemon
          Preheat oven to 375 degrees. Prep a 12 muffin pan with paper liners or an oil rub/spray.
          In a large bowl, whisk together the yogurt, milk, egg, oil, lemon juice, zest, and vanilla. Add dry ingredients on top of the whisked wet ones: flour, sugar, baking powder, baking soda, and salt.
          Fold the wet & dry ingredients together until combined, but don’t overmix (that’ll create a tough muffin).  Gently fold in the 3/4 cup of blueberries.  Fill muffin cups, then bake for approx 25 minutes at 375.
          Recipe inspiration from Baker Street

          Saturday, June 16, 2012

          Cold-Brewed Iced Coffee

          It’s officially summer when you can make the switch from hot to iced coffee. There’s nothing better than a frosty glass of iced coffee on a warm summer morning. 
          This recipe isn’t a new one – we’ve been seeing it pop up all over the place this summer – but we’ve been enjoying it so much lately that we thought we’d snap some pictures and share it with you. It goes perfectly with our Vanilla Simple Syrup (and cream)!


          Cold brewed coffee can last for up to 2 weeks in the fridge (NY Times says so!). We’ve consumed ours well before 2 weeks have gone by, but it is very handy to be able to make a double batch of coffee and have it ready to drink for more than just one morning.

          The idea with cold brew coffee is that because there is no heat involved in the cold brew process, the coffee is smoother and less bitter than traditional coffee. According to America’s Test Kitchen:
          Exposed to far less heat, cold-brew is significantly less acerbic than its sweltering sibling. Less bitterness means that the subtler flavors found in coffee beans are more perceptible. For me, good cold-brew balances hints of dark chocolate, caramel, ripe black fruits, and vanilla with a pleasant viscosity, mild acidity, and pitch perfect bitterness.

          Cold-Brewed Iced Coffee

          • 4 cups water
          • between 3/4 c. and 1 c ground coffee (depending on how strong you like your coffee)
          Mix together, then let sit on the countertop for 12 to 24 hours. I do it either the morning before or the evening before.
          After the coffee and water have steeped, strain the coffee through a metal or paper coffee filter, into a glass pitcher. Serve! Store in the refrigerator for up to 2 weeks.

          Monday, May 7, 2012

          Lemon Yogurt Cake

          It’s amazing how much flavor a healthy dose of lemon zest can contribute. This cake has a brown crisp top, then inside it’s dense and lemony. I personally recommend eating a slice as soon as you pull it out of the oven so you can enjoy the lemony steam this cake creates!
          lemon yogurt cake 1
          We’ve really been getting our money’s worth from the latest Bon Appetit magazine. The Agave Margaritas were a big success and then we moved right along to this delicious cake. It’s a classic French recipe; the magazine says that it is one of the first recipes French mothers teach to their children. And so I have to assume that everyone in France has this delicious cake recipe memorized. Right? Either way, it’s a great classic recipe.
          lemon yogurt cake 3
          The lemon zest is added to the sugar, then the two are rubbed together until the oils in the lemon are evenly distributed and the sugar becomes clumpy and moist. The cake comes out of the oven with a shiny brown top, and as you slice it open you’ll release a burst of lemony steam. Enjoy!
          lemon yogurt cake action

          Lemon Yogurt Cake

          recipe by Bon Appetit


        • 1 1/2 cups all-purpose flour
        • 2 tsp baking powder
        • 3/4 tsp salt
        • 1 cup sugar
        • 1 Tbsp lemon zest
        • 3/4 cup whole milk Greek yogurt
        • 1/2 cup vegetable oil
        • 2 large eggs
        • 1/2 tsp vanilla extract Preheat oven to 350.  Grease & flour an 8 1/2” loaf pan.
          Combine flour, baking powder, and salt in a bowl.
          Combine lemon zest and sugar in a large bowl, and rub the two together with your fingers until the sugar is moist. Add yogurt, oil, eggs, and vanilla – stir to combine completely.
          Fold dry ingredients into wet and stir gently until  just to combined.
          Pour batter into pan, smooth top, and bake at 350 for 50-55 minutes. Let cool for 15 minutes before cutting.
        • lemon yogurt cake 2

          Thursday, March 22, 2012

          Oven-Puffed Pancake with Berries

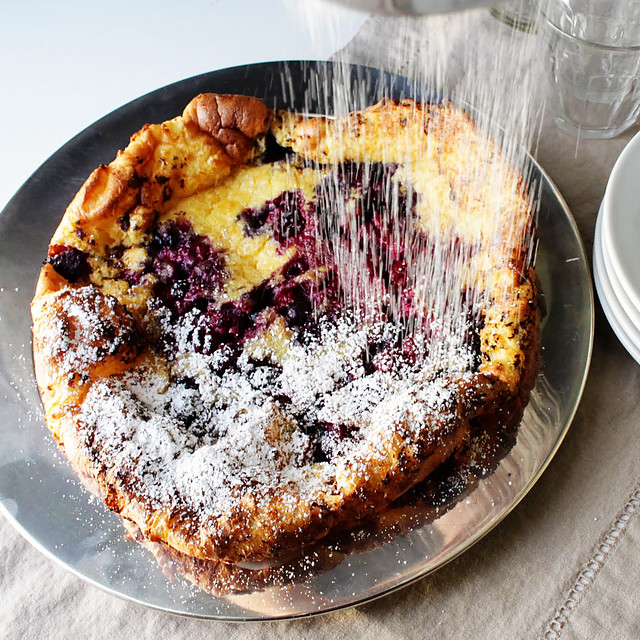
          I'm all for pancakes in the morning, but I am not a fan of standing at the stovetop endlessly pouring and flipping. The oven-puffed pancake (a.k.a., Dutch baby, Dutch pancake, German pancake) is the solution. Pour it in, bake it, and you are ready to go in a flash. Plus, with the dramatic puff as it emerges from the oven -- and then the warm custardy center -- this pancake has a whole lot more pizzazz than the usual flapjack.
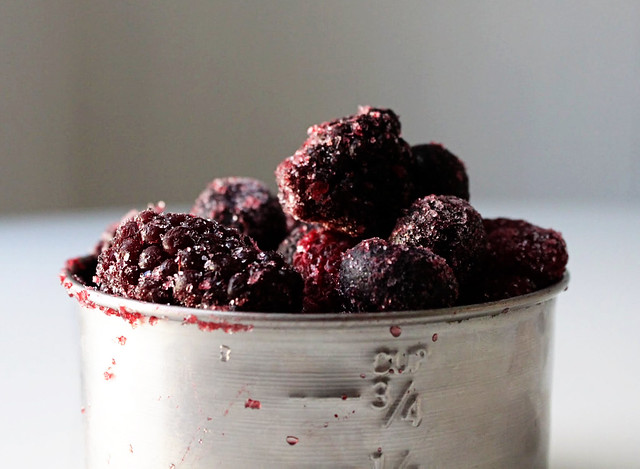
          While we wait through this seemingly endless non-growing season, we reached to the back of our freezer for a bag of tasty frozen berries. Just a quick toss of berries brings a simple puffed pancake to new heights. A sprinkling of powdered sugar lends a little extra sweetness and elegance.
          Like our earlier recipe for baked eggs with a crispy hash brown eggs, you are likely to already have these ingredients in your refrigerator. So grab your trusty cast iron skillet, and let's do this...
          Oven-Puffed Pancake with Berries

          From Hay Day Country Market Cookbook
          • 3 tbs unsalted butter
          • 3/4 cup all-purpose flour
          • 1/2 tsp salt
          • 3 eggs
          • 1 cup milk
          • 1 tsp vanilla extract
          • 1 cup blueberries, raspberries, or blackberries (or combination), fresh or frozen
          • powdered sugar, for sprinkling
          1. Preheat the oven to 450 F. Place the butter in a 10-in oven-proof skillet (preferably cast iron), and place it in the oven.
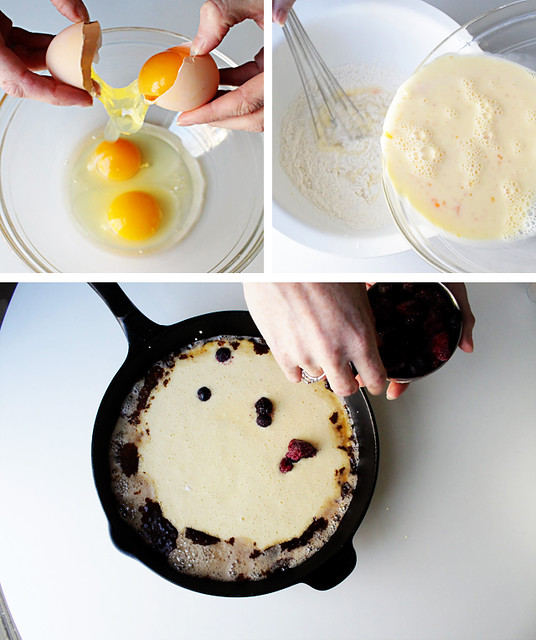
          2. Combine the flour and salt in a large mixing bowl. In another bowl, whisk together eggs, milk, and vanilla. Add this to the dry ingredients, and whisk until combined and smooth.
          3. Wearing an oven mitt, remove the hot skillet from the oven (the butter should be bubbling), and pour in the batter all at once. Sprinkle the berries evenly over the top, and return the skillet to the oven. Bake until the pancake is nicely browned and puffed around the edges, 12 to 15 minutes.
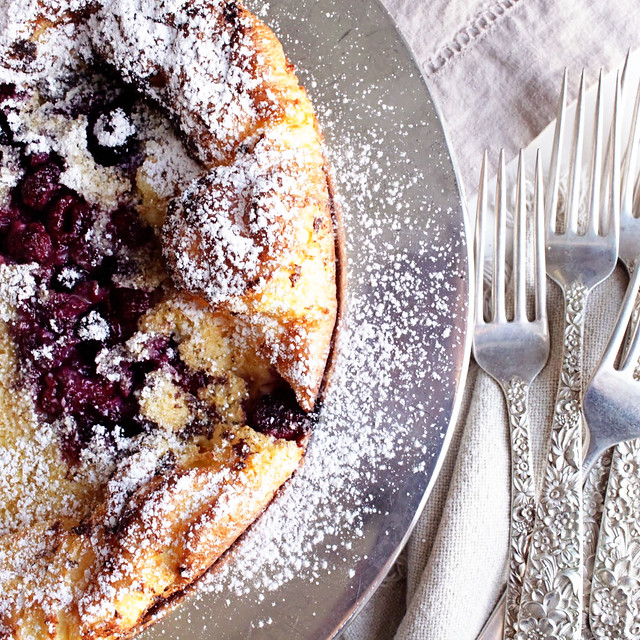
          4. Remove the pancake from the oven (don't forget that oven mitt!). Carefully transfer to a serving platter, and sprinkle with powdered sugar. 

          Thursday, February 16, 2012

          Baked Eggs with Crispy Hash Brown Crust

          One of the highlights of our winter brunch menu was this dish:  Eggs topped with cheese, baked in a cast iron skillet, with a crispy hash brown crust hidden below.  This one is much simpler than it looks. It’s really only three ingredients: potatoes, eggs, and cheese. I love recipes that use ingredients I almost always have stocked.

          Baked Eggs with Hashbrown Crust

          The key to this one is pressing the freshly shredded potatoes between dish towels or layers of paper towels to get them as DRY as possible.  That dryness is what aids in their transformation to the crispy hash brown crust.  Once they’re dry you press them firmly and evenly into the bottom of a hot cast iron skillet. 

          After the first side is browned you flip the whole crust over to brown on the other side.  The shredded potatoes are so intertwined that the flip is actually pretty easy to do.

          Baked Eggs with Hashbrown Crust

          I’ve made this multiple times over the past few weeks.  It feels special and fancy for a weekend morning breakfast, but it’s so easy to pull together. 

          Baked Eggs with Hashbrown Crust


          Baked Eggs with Crispy Hash Brown Crust

          • 1 1/2 – 2 cups fresh shredded potato (about 4 medium sized red potatoes)
          • 1/2 tsp salt
          • 6 eggs
          • 3/4 cup shredded cheese (we used sharp white cheddar)
          • 2 Tbsp olive oil for cast iron skillet
          Shred the potatoes (I used my food processor to make quick work of this).  The quantity of potatoes you use is flexible – less will create a thinner crispier crust, more will create a thicker crust that’s soft in the middle.  I’ve done it both ways and I think I like the thinner/crispier crust… Toss the shredded potatoes with the salt, then press them firmly between two dish towels or a few layers of paper towels.  The goal is to get as much moisture out of the potatoes as possible so they’ll brown up nice and crisp.
          Heat a cast iron skillet with the olive oil over medium high heat.  Add the potatoes and use the back of a large spoon to spread them evenly and then press them down firmly into a flat pancake.  Let them sit and brown, undisturbed, for about 3-4 minutes.  Make sure your heat isn’t so high that it burns the potatoes – you want them to get golden brown but not burn.  You can use your spoon to lift up an edge and take a peek to monitor progress.
          When the first side is brown, use a large spatula to flip the whole thing over.  They shredded browned potatoes should be interwined with each other enough that this isn’t too difficult to do.  Let the 2nd side brown for an additional 4 minutes.
          When both sides of the crust are browned, remove from heat and crack the 6 eggs evenly over the top.  Season with a little salt and pepper if desired, then sprinkle the 3/4 cup of shredded cheese over the eggs.
          Pop in the oven on broil for 5-7 minutes, depending on whether you like your eggs to be soft or hard.  I like mine hard, so I let them broil for the full 7 minutes.  Slice, serve, enjoy!
          Baked Eggs with Hashbrown Crust

          Tuesday, January 17, 2012

          Chocolate Hazelnut Biscotti

          These delicious biscotti are one of my favorite ways to start the day. They are only slightly chocolatey with the flavor of hazelnut taking center stage. Pair these with a strong cup off coffee and you are good to go. If you can bear to part with them, they are a great option for packaging up in pretty tins to give away as gifts.
          This is not a difficult recipe, but it does take some time. It is only hands on here and there, but there's a lot of time spent waiting, so make these on a morning when you will be around the house for a little while. This is another recipe from my favorite out-of-print (but still available at Amazon) cookbook The Hay Day Country Cookbook.
          Chocolate Hazelnut Biscotti
          • 1 1/3 cups whole hazelnuts (skins on or blanched)
          • 8 tbs unsalted butter, at room temperature
          • 1 cup sugar
          • 2 eggs
          • 2 1/3 cups unbleached all-purpose flour
          • 3 tbs unsweetened cocoa powder
          • 1/2 tsp baking soda
          • 1/2 tsp baking powder
          • 1/8 tsp salt
          1. If you have skin-on hazelnuts, toast them in a 375 F oven for about 8 minutes. (Skip to step 2 if you have blanched hazelnuts). Immediately remove them to a clean kitchen towel and rub furiously to remove as much of the skins as possible. Don't fret if they don't all come off. They never do. Put oven at 325 F. Skip to step 3.
          2. If you have blanched hazelnuts, toast them at 325 F until lightly browned and fragrant, about 8 minutes.
          3. Meanwhile, i a large bowl, cream the butter and sugar together with an electric mixer on high speed until light and fluffy. Add eggs and vanilla, and mix until smooth.
          4. In another mixing bowl, whisk together flour, cocoa, baking soda, baking powder, and salt. Add this to the creamed mixture, and blend on low speed just until a stiff dough forms and pulls away from the sides of the bowl.
          5. Coarsely chop half of the toasted nuts, and stir both the chopped and the whole nuts into the dough. Divide the dough in half and using lightly floured hands, form each half into a 12 x 3-inch flattened log. Place the logs, spaced at least 2 inches apart, on a large ungreased baking sheet. Bake at 325 F until firm, lightly browned and cracked on top, 25 to 30 minutes.
          6. Remove the baking sheet from the oven and reduce the oven temperature to 300 F. Allow the logs to cool on the sheet for 10 minutes. Then loosen them with a large flat spatula and transfer them to a cutting board. Using a thin sharp knife, cut them into 1/2-inch thick slices. Return the slices to the baking sheet, cut sides up, and return the baking sheet to the oven. Bake, rotating the pan once, until the biscotti are firm and dry throughout, 20-35 minutes. (They will crisp up as they cool.)
          7. Allow biscotti to cool completely on the baking sheet for at least 30 minutes. Then transfer them to jar or tin for storage. Makes about 48 biscotti.

          Sunday, January 8, 2012

          Homemade Coconut Almond Granola

          Homemade granola is another one of those things that tastes much better than the store-bought variety, is incredibly simple to make at home, and in the end costs a lot less than buying a box of cereal at the grocery store.


          You know how we try to avoid things like Yellow Dye #5 and high fructose corn syrup?  I just read about a new one the other day – cellulose (wood pulp)!  Are you kidding me?  *shudder*

          But back to the delicious granola! Dulcie was a little worried that homemade granola would have a sort of weird 70s hippie commune vibe, but I won her over by using big curls and flakes of real unsweetened coconut, local honey, coconut oil, and a smattering of tiny sesame seeds for their delicious taste and texture.


          Making one huge batch of granola is super easy. After baking, I let it cool completely on its baking sheet then store it in glass jars in my pantry and enjoy its prettiness all week.


          We’ve been eating our latest batch topped with fresh blueberries and whole milk.  Mmmm!


          After mixing together the dry ingredients, you need to melt the sweetener and oil together stovetop, then drizzle over all the dry ingredients. I like to use honey and coconut oil but you could sub in equal amounts of maple syrup or agave for sweetness; vegetable oil for the fat.


          Thanks to the lovely and talented Sarah at My New Roots for the recipe inspiration. Check out her recipe if you’re a granola lover - she has lots of great suggestions for alternate flavor combinations and ideas to spice things up and make the granola your own unique creation.

          Homemade Coconut Almond Granola

          3 c rolled oats
          1 c large flake coconut (unsweetened)
          1 c coarsely chopped raw almonds
          1/2 c raw sesame seeds
          1/2 c honey
          1/2 c coconut oil

          Combine all dry ingredients in a large bowl.
          Melt the honey & coconut oil together in a small pot on the stovetop.  When melted, drizzle over the dry ingredients and toss with your hands to coat thoroughly. 
          Spread the raw granola thinly and equally over two rimmed baking sheets
          Bake at 350 F for 15 minutes, or until toasty golden brown. Check in after 10 minutes to monitor done-ness, and give a quick stir at this point to help everything brown evenly.
          Related Posts Plugin for WordPress, Blogger...