Showing posts with label appetizer. Show all posts

Monday, April 16, 2012

Homemade Hummus

Homemade hummus is another one of those recipes that is so easy to make super fresh at home.  I’ve made a lot of hummus over the years, and in my research I learned a trick to making really creamy (as opposed to “grainy bean mash”) hummus. Yes, we have a trick to share with you! It’s easy.

Homemade Hummus

The secret to creamy hummus is the order in which you combine the ingredients. You start with the tahini, lemon juice, and water. Whir these together like crazy to create a totally smooth and creamy emulsion – it should look like thick cream. THEN you add the chickpeas and garlic and blend until smooth. The chemistry of whatever happens here creates the end result of creamy hummus rather than grainy bean mash. If you’re interested, drop in on some nice vegetarians ranting and raving about this over here.

Tahini & Lemons

You can catch a glimpse of the tahini emulsion in the upper right picture, below.

Making Hummus

Top your creamy fresh hummus with chopped parsley, drizzle with olive oil, and serve.  We (and our toddlers!) love this with carrots, pea pods, pita bread triangles, cabbage wedges, and loads of harissa.  Well…not the toddlers on that last one.

Homemade Hummus

Homemade Creamy Hummus

  • 1/4 cup tahini
  • 1/4 cup fresh lemon juice
  • 2 Tbsp water
  • 4 small cloves of raw garlic (the raw garlic adds a spicy kick so adjust according to your tastes!)
  • 16 oz can chickpeas, drained
  • 1/2 tsp salt
Put tahini, lemon juice, and water in the food processor. Blend (and scrape down if any tahini sticks) until it forms a thick creamy emulsion.
Blend garlic and salt into the tahini cream.
Add the chickpeas and blend until your hummus is totally smooth and creamy. Note that this recipe calls for fewer chickpeas (in proportion to the other ingredients) than many other recipes – it is more tahini and lemon heavy, which helps achieve that delicious texture!
Homemade Hummus

Monday, March 12, 2012

Lemon Asparagus

We found bundles of skinny new asparagus at the store this week! This recipe is our winner for spring asparagus.  It’s so simple and fast, but feels special and fancy.  That’s our favorite type of recipe, after all.  Here’s our trick:

lemon asparagus 4

Thin lemon slices arranged on a baking sheet.  Olive oil drizzled asparagus arranged in a layer over the top of the lemons.  Sprinkle with salt, broil for a few minutes.   Done!

lemon asparagus 2

The lemons get a little charred, and waft their lemony vapors up into the asparagus as they roast. 

lemon asparagus 1

The asparagus gets a little charred, too, during their quick trip under the broiler.  I especially love this treatment for the super skinny asparagus because their pointy tips get crispy and brown.  Oh and PS: our 2 year olds loved these!  And I quote “more green! more asparagarararasuss!”  Great liberties were taken with the pronunciation of the word asparagus.  We basked in the glow of toddlers gobbling vegetables of their own free will.

lemon asparagus 3

Lemon Asparagus

  • One pound fresh asparagus
  • One lemon
  • 2 Tbsp olive oil
  • sprinkle of salt

Thinly slice the lemon.  Arrange in one flat layer on a baking sheet.

Toss the asparagus with the olive oil until evenly coated.  Arrange asparagus over the lemon slices.  Sprinkle with salt.  Broil for approx 6 minutes (in our oven) or until asparagus spears get a few browned and crispy areas.

lemon asparagus 5

Sunday, March 4, 2012

Spring Herb Quinoa Patties

Spring is so close! But really, it’s just barely here.  If you’re lucky you might have some tender leaves sprouting in your herb pots (I found chives in mine today!) but other than that we still have a bit of a wait until it’s really spring.

Those tiny little spring herb leaves are so exciting, though, that we wanted to let them shine in these delicious quinoa patties. Mint, parsley, and green onion are tossed with quinoa and shavings of flavorful cheese.  Crispy on the outside and packed with flavor, this is my spring go-to lunch.

Quinoa Patties with spring herbs

These are made with simple whole foods ingredients. All you do is mix everything up in a bowl, then form little patties and pan fry them until they’re golden and crisp on each side. 

Quinoa Patties with spring herbs

The mixture stores well in the fridge for a few days, so you can whip up a full batch and then fry just a few each day for lunch.  That’s what I’ve been doing! 

Quinoa Patties with spring herbs

Spring Herb Quinoa Patties

inspired by a recipe in Super Natural Every Day, by Heidi Swanson
Yield is 8-10 patties
  • 2 cups cooked quinoa (about 3/4 c. dry)
  • 2 eggs
  • 2 Tbsp chopped green onion
  • 2 Tbsp chopped mint
  • 2 Tbsp chopped parsley
  • 1/2 c. grated strong cheese – we used an aged sheep’s milk cheese
  • 1/2 c. bread crumbs
  • 1/4 tsp salt
Combine everything but the quinoa in a large bowl and mix well.  Fold in the cooked quinoa until it’s fully incorporated and the mixture is even.
Heat a large frying pan, with a drizzle of oil to coat, to medium high.
Using a spoon & your hands, form appox 2” patties with the quinoa mix and plop them into the hot frying pan.
Cook each side for approx 3 minutes, or until golden brown.  Don’t disturb them for the first minute or two to prevent them from falling apart!  Flip, and cook the other side for an additional 3-ish minutes, or until both sides are golden brown.
Serve with more freshly grated cheese on top.
Quinoa Patties with spring herbs

Wednesday, October 26, 2011

Apple Brie Tart

This simple tart with flaky crust and tart apple slices sandwiching a layer of bubbling brie is a perfect fall dish.


The fun part of this tart is it’s very simple to make – it really only has three ingredients if you count “crust” as one ingredient.  But the final product is gorgeous and impressive.  The thinly sliced apples arranged in a pretty rose shape with brie bubbling up between them is basically irresistible.


I recently had a little house warming party and served a couple of these tarts (one was apple brie, the other pear camembert) as appetizers. They were perfect – not too sweet, not too savory, and easy to eat while socializing with our park playdate group.


Most of the toddlers in the group seemed to like them, too, which is always a nice surprise!

Thank you to A Spicy Perspective for the recipe inspiration!

Crust (makes 2, so save one for later):

  • 2 cups all purpose flour
  • 1/2 tsp salt
  • 12 Tbsp (1.5 sticks) butter, cut into small 1/4” cubes
  • Have measured 1/2 c ice cold water
From the Alice Waters classic. Mix the flour & salt together.  Cut or work the butter cubes into the flour mixture, leaving some fairly large irregular pieces.  I do this in the food processor, and just hit pulse a few times until it just becomes irregular and grainy.  Pour in about 3/4 of the ice water, pulse a few more times, then add the rest of the water if needed until the mixture sticks together into a rough ball.
Divide the dough into two, wrap in plastic, flatten into discs, and refrigerate for a few minutes or days (depending on when you want to use the dough, you can make it a day or two in advance). 
Roll one of the discs out in a circle to fit a 10” tart pan. No need to prebake the crust.

Filling:

  • 2 large apples.  I like honeycrisp best.
  • 8 oz brie, approx.  This is about the size (maybe a little less) of one of a standard smallish wheel of brie that’s commonly available at the supermarket.
Slice the brie into 1/4” thick planks.  Core & quarter the apples, then slice them as thinly as possible.   Line the bottom of the tart evenly with slices of brie, then top with the apple slices.  To arrange the apple slices, start at the outer edge to create the first circle of overlapping pieces.  Line the pieces up very closely in order to create a good total thickness of apple for the top of the tart – you don’t want to wind up with a paper thin layer of apples in the end.  For the center, stand the apples up with skins out in concentric circles to form a rose shape.  Bend the apples into smaller & smaller circles to create the pretty rose shape.  I learned how to do it here, at a Spicy Perspective, which is also the source of my recipe inspiration!
Bake at 400 for 40 minutes – until the brie is bubbling up and golden.
Let rest and cool for at least 15 minutes before cutting & serving.  This helps it hold together and not completely slip apart due to the hot bubbling brie!


Thursday, October 6, 2011

Spiced Nuts

Now that it’s October, we felt the need to roast some nuts to a sweet and autumn-spiced crunch.
spiced nuts 1
These are the result, and the main thing I have to say about them is that I had no idea it was so easy to replicate the super crunchy crispy nuts that you can find at street fairs during the holiday season. 
The egg whites create a very nice and extremely crispy shell, the sugar does what sugar should do, and the spices make these taste like fall.  And Dulcie and I agree that fall is the #1 best season.  Don’t you?

Spiced Nuts

  • 2 eggs whites
  • 4 cups whole raw nuts (I used almonds, walnuts, and pecans)
  • 1 cup white sugar (vanilla sugar if you have it!)
  • 2 tsp cinnamon
  • 1/4 tsp ground cloves
  • 1/2 tsp nutmeg
Add the two eggs whites to a large bowl and whisk until broken up and just starting to become foamy.
Add the 4 cups of nuts and stir well to completely coat the nuts in the egg white.  Add sugar and spices, stir well to coat.  Spread the nuts into a single thin layer on 2 baking sheets covered in parchment.
Bake at 300 degrees for 30-40 minutes, or until nuts are no longer sticky and flexible.  Let cool completely, then break apart and enjoy.
Thank you to 101cookbooks for the technique inspiration!
spiced nuts 2

Monday, August 1, 2011

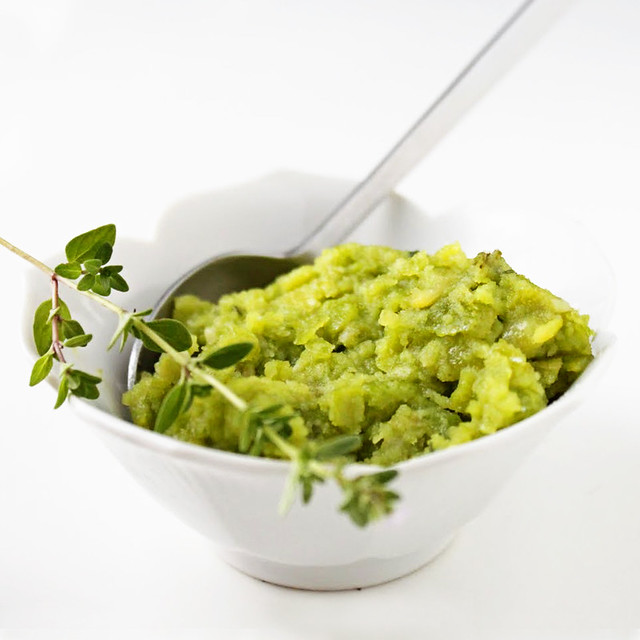
Fava Bean Puree

Does anyone really think of fava beans without thinking of Hannibal Lecter? Well, hand me a glass of nice chianti, because these lovelies are in season. But fava beans are one of the many veggies that I get in my box of organic produce that at first cause excitement and then distress. I simply don't know what to do with them. If you are in the same position, I hope this fava bean puree piques your interest.

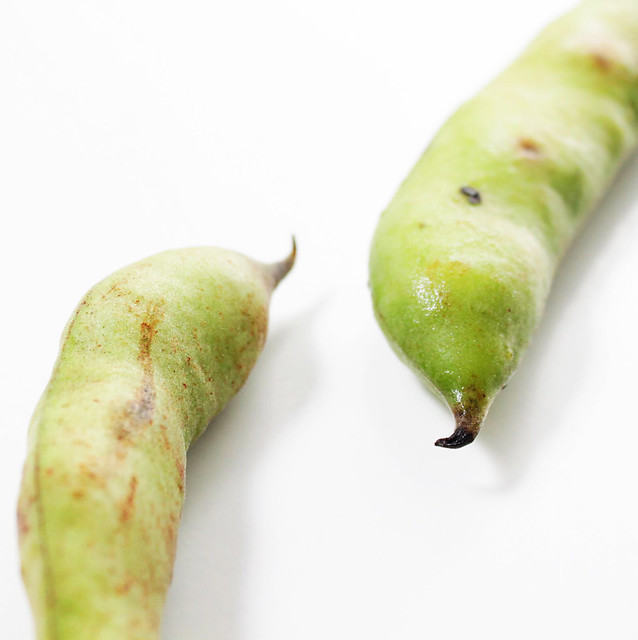
Make no mistake, fava beans are a bit labor intensive to get into the pot. They need to be shelled from their exterior pod, and then each individual bean must be removed from its waxy shell. Parboiling helps to make quick work of that. If you have a friend to chat with while shelling, then you'll be surprised how quickly the time goes.

We used the rather small amount of beans that were in my produce box. The resulting amount of puree was very small -- enough to spread on about 8 thin slices of baguette. (It was a perfect appetizer for Sarah, myself, and our husbands!) It would easily double, so if you find yourself with a pound of favas, give that a try.

Fava Bean Puree

adapted from Alice Waters' In the Green Kitchen

  • 1/2 lb fava beans in their pods
  • 2 tbs olive oil
  • 2 tbs water
  • salt
  • 1 garlic clove
  • 1 tsp fresh thyme, minced

1. Remove the beans from their outer pods.

2. Parboil the beans for 30 seconds to loosen the shell, and then use your thumbnail to tear the skin at one end, then squeeze to pop out the bean.

3. Heat olive oil in saucepan and add beans, water, and a pinch of salt. Cook gently for 15 minutes or so, until beans are very soft. Add the garlic and thyme and cook a couple minutes longer.

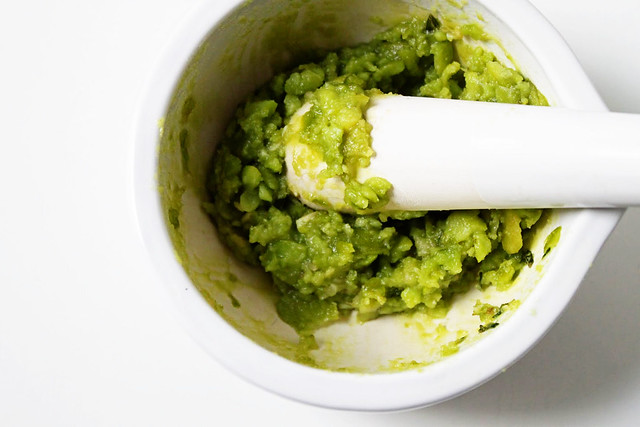
4. Mash the beans with a mortar and pestle. Taste and add more salt or olive oil as needed. Makes only about 1/3 cup or so; recipe doubles easily.

Tuesday, June 7, 2011

Homemade French Fries

After we’d successfully made our own ketchup, we knew we had to tackle french fries next. 
french fries bowl sq
Although our toddlers are happy to dip just about anything in ketchup, we can’t say the same for ourselves.  Pretzel sticks and ketchup? Nice work on thinking outside of the box and not being constrained by societal norms, but no thank you.  French fries and ketchup?  Sign me up!
french fries cone sq
Over the course of our research we learned of a few different methods for creating oven roasted french fries.  You can parboil the fries before roasting. You can soak them in water. Or, you can just cut them up and roast them in oil.
We opted for soaking the raw, cut fries in cold water for 15 minutes, draining the cloudy starchy water, then rinsing the fries very well.  The final product is not quite a deep-fried fry, but they’re also a far cry from plain old roasted potatoes.  I think the thinly cut strips, along with the soaking in cold water to remove starch, are the reasons these work so well.  And of course, the homemade ketchup was just icing on the cake!
french fries overhead sq

Homemade French Fries

  • 4 large russet potatoes
  • 1/4 c. peanut or canola oil (chosen for its high smoke point)
  • generous sprinkle of salt
Preheat oven to 450. 
Cut the potatoes into 1/4” strips.  We found the thinness did a lot to prevent these from tasting like regular roasted potato chunks.
Toss the cut fries into a bowl of cold water as they are cut.  Let soak for 15 minutes, then drain away the cloudy starchy water.  Rinse very well, then dump the wet fries onto a dish towel and blot them dry.  If you were to roast too-wet fries they’d steam instead of roast, and be mushy in the end. Ew.
Toss the dried fries with the 1/4 c. oil, then spread them in a single layer – we used two large rimmed baking sheets, that we spread thinly with oil.  We’d recommend against using un-rimmed cookie sheets…you don’t want to start a grease fire!  Sprinkle generously with salt.
Roast for 15 minutes, then retrieve the baking sheets and toss the fries around with a spatula.  Return to the oven for another 15 minutes or so (you may need an extra 5 to 10 minutes -- one of our batches required more time, possibly because of the type of cookie sheet), until the fries are golden brown and blistered in spots.
So, does anyone else out there have any hard won french fry making advice?
french fries bowl

Monday, May 2, 2011

Radishes with Herbed Butter on Baguette

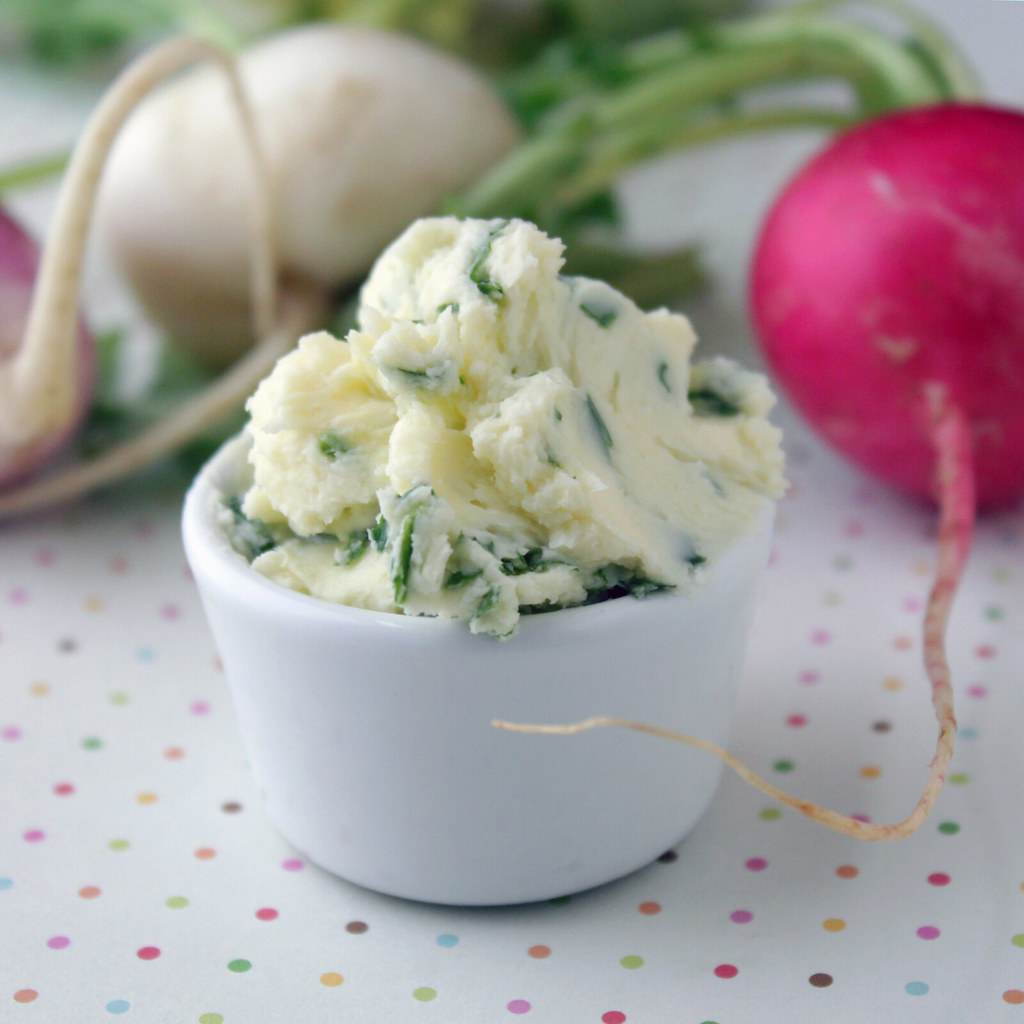
I've never been much of a fan of radishes, but I don't think I ever really knew what to do with them. I discovered these beautiful Easter Egg radishes at my local market, and I just couldn't resist them. I'd heard that people ate them with butter and salt (two of my favorite things!), and it seemed like it was high time that I gave it a try.
We wanted to revisit our homemade butter, but it turned out we both decided to take advantage of our toddlers' naps by napping ourselves rather than making butter. Still, it would be so good with homemade butter. (Note to selves: next time we must use fresh butter!) We took our supermarket butter and creamed it with some parsley, lemon, and kosher salt. The herbed butter was the perfect accompaniment to the mild radishes' peppery bite.

Radishes with Herbed Butter on Baguette
  • 6 tbs unsalted butter, softened
  • 2 tbs parsley, minced
  • spritz of lemon
  • kosher salt, to taste
  • 6 radishes, sliced thinly
  • 1 small baguette, sliced
  • parsley, for garnish
Mix together butter, parsley, lemon juice, and salt in a small bowl. Spread herbed butter on a slice of baguette, top with a slice or two of radish. Top with a sprig of parsley! Repeat. 

Sunday, May 1, 2011

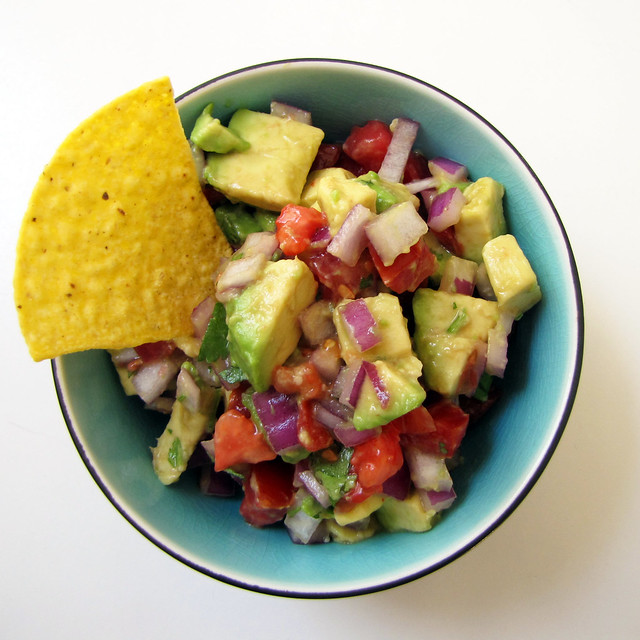
Avocado Salsa

We're lucky to live very close to "America's Foodiest Town," aka, Boulder, Colorado. And although the word "foodiest" makes me break out in hives, it is great to have access to Boulder's thriving restaurant scene. One of the many excellent restaurants in Boulder is Centro Latin Kitchen and Refreshment Palace.  Centro has a very delicious (and rather pricy) avocado salsa which was the inspiration for this recipe and would be another great Cinco de Mayo treat.

Essentially a fresh salsa with large chunks of avocado, or a guacamole which didn't get the mortar-and-pestle treatment, avocado salsa lets you really savor all of the fresh ingredients.


Avocado Salsa


  • 1 large avocado, chopped 1/2 inch chunks
  • 1 medium tomato, chopped
  • 1/4 cup red onion, chopped
  • 2 tbs cilantro, chopped
  • juice of 1 lime
  • kosher salt, to taste

Gently combine all ingredients and serve with tortilla chips! This would serve 2-3, but you can easily double or triple the recipe as needed.

Related Posts Plugin for WordPress, Blogger...